
Elementor Connector for WP Job Manager allows you to build unique Job Boards on any Elementor-powered website using new widgets and design components empowered by WP Job Manager. This allows you to place Job Board components (widgets) anywhere on any page or post, and then style the design and layout of these widgets, along with the page/post until it meets your desired look and feel.
It’s the perfect Elementor extension to customise your WordPress Job Board!
In order for Elementor Connector for WP Job Manager to work, you will need the latest version of the following:
To make use of the advanced features of this plugin, you’ll also need the following:

To install Elementor Connector for WP Job Manager, please follow these steps:
If you need to install WordPress plugins manually via FTP, please follow the guide: “How to Install a WordPress Plugin – Step by Step for Beginners“.
Please note that both Elementor and WP Job Manager needs to be installed and activated before activating the Elementor Connector for WP Job Manager
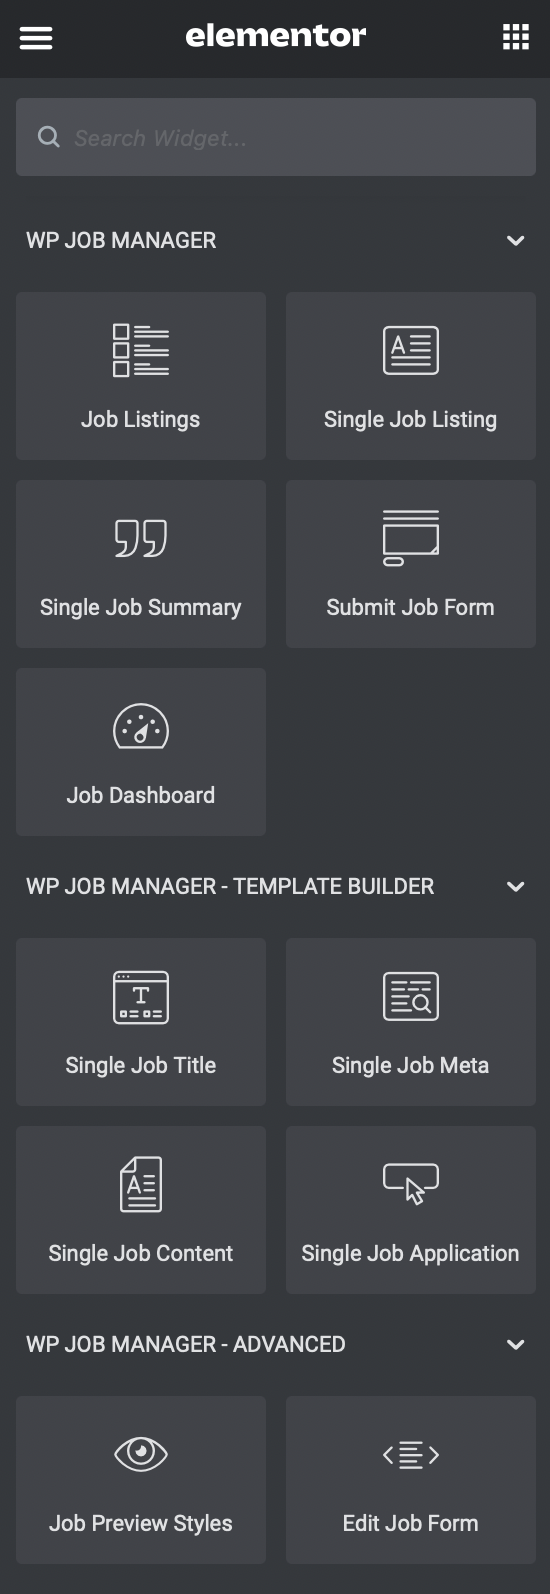
When Elementor Connector for WP Job Manager is active, the following Elementor widgets are added to your Elementor page editor / themebuilder settings:
WP Job Manager
WP Job Manager – Template Builder (Requires Elementor Pro)
WP Job Manager – Advanced
The Job Listings widget is the heart of the Elementor Connector for WP Job Manager and is used to display the job search form and/or a list of jobs that meet meet specific criteria.
To add the Job Listings widget to a page/post on your website using Elementor, follow these steps:
Once a widget has been added to the page, the widget settings panel will appear on the left with the following options:
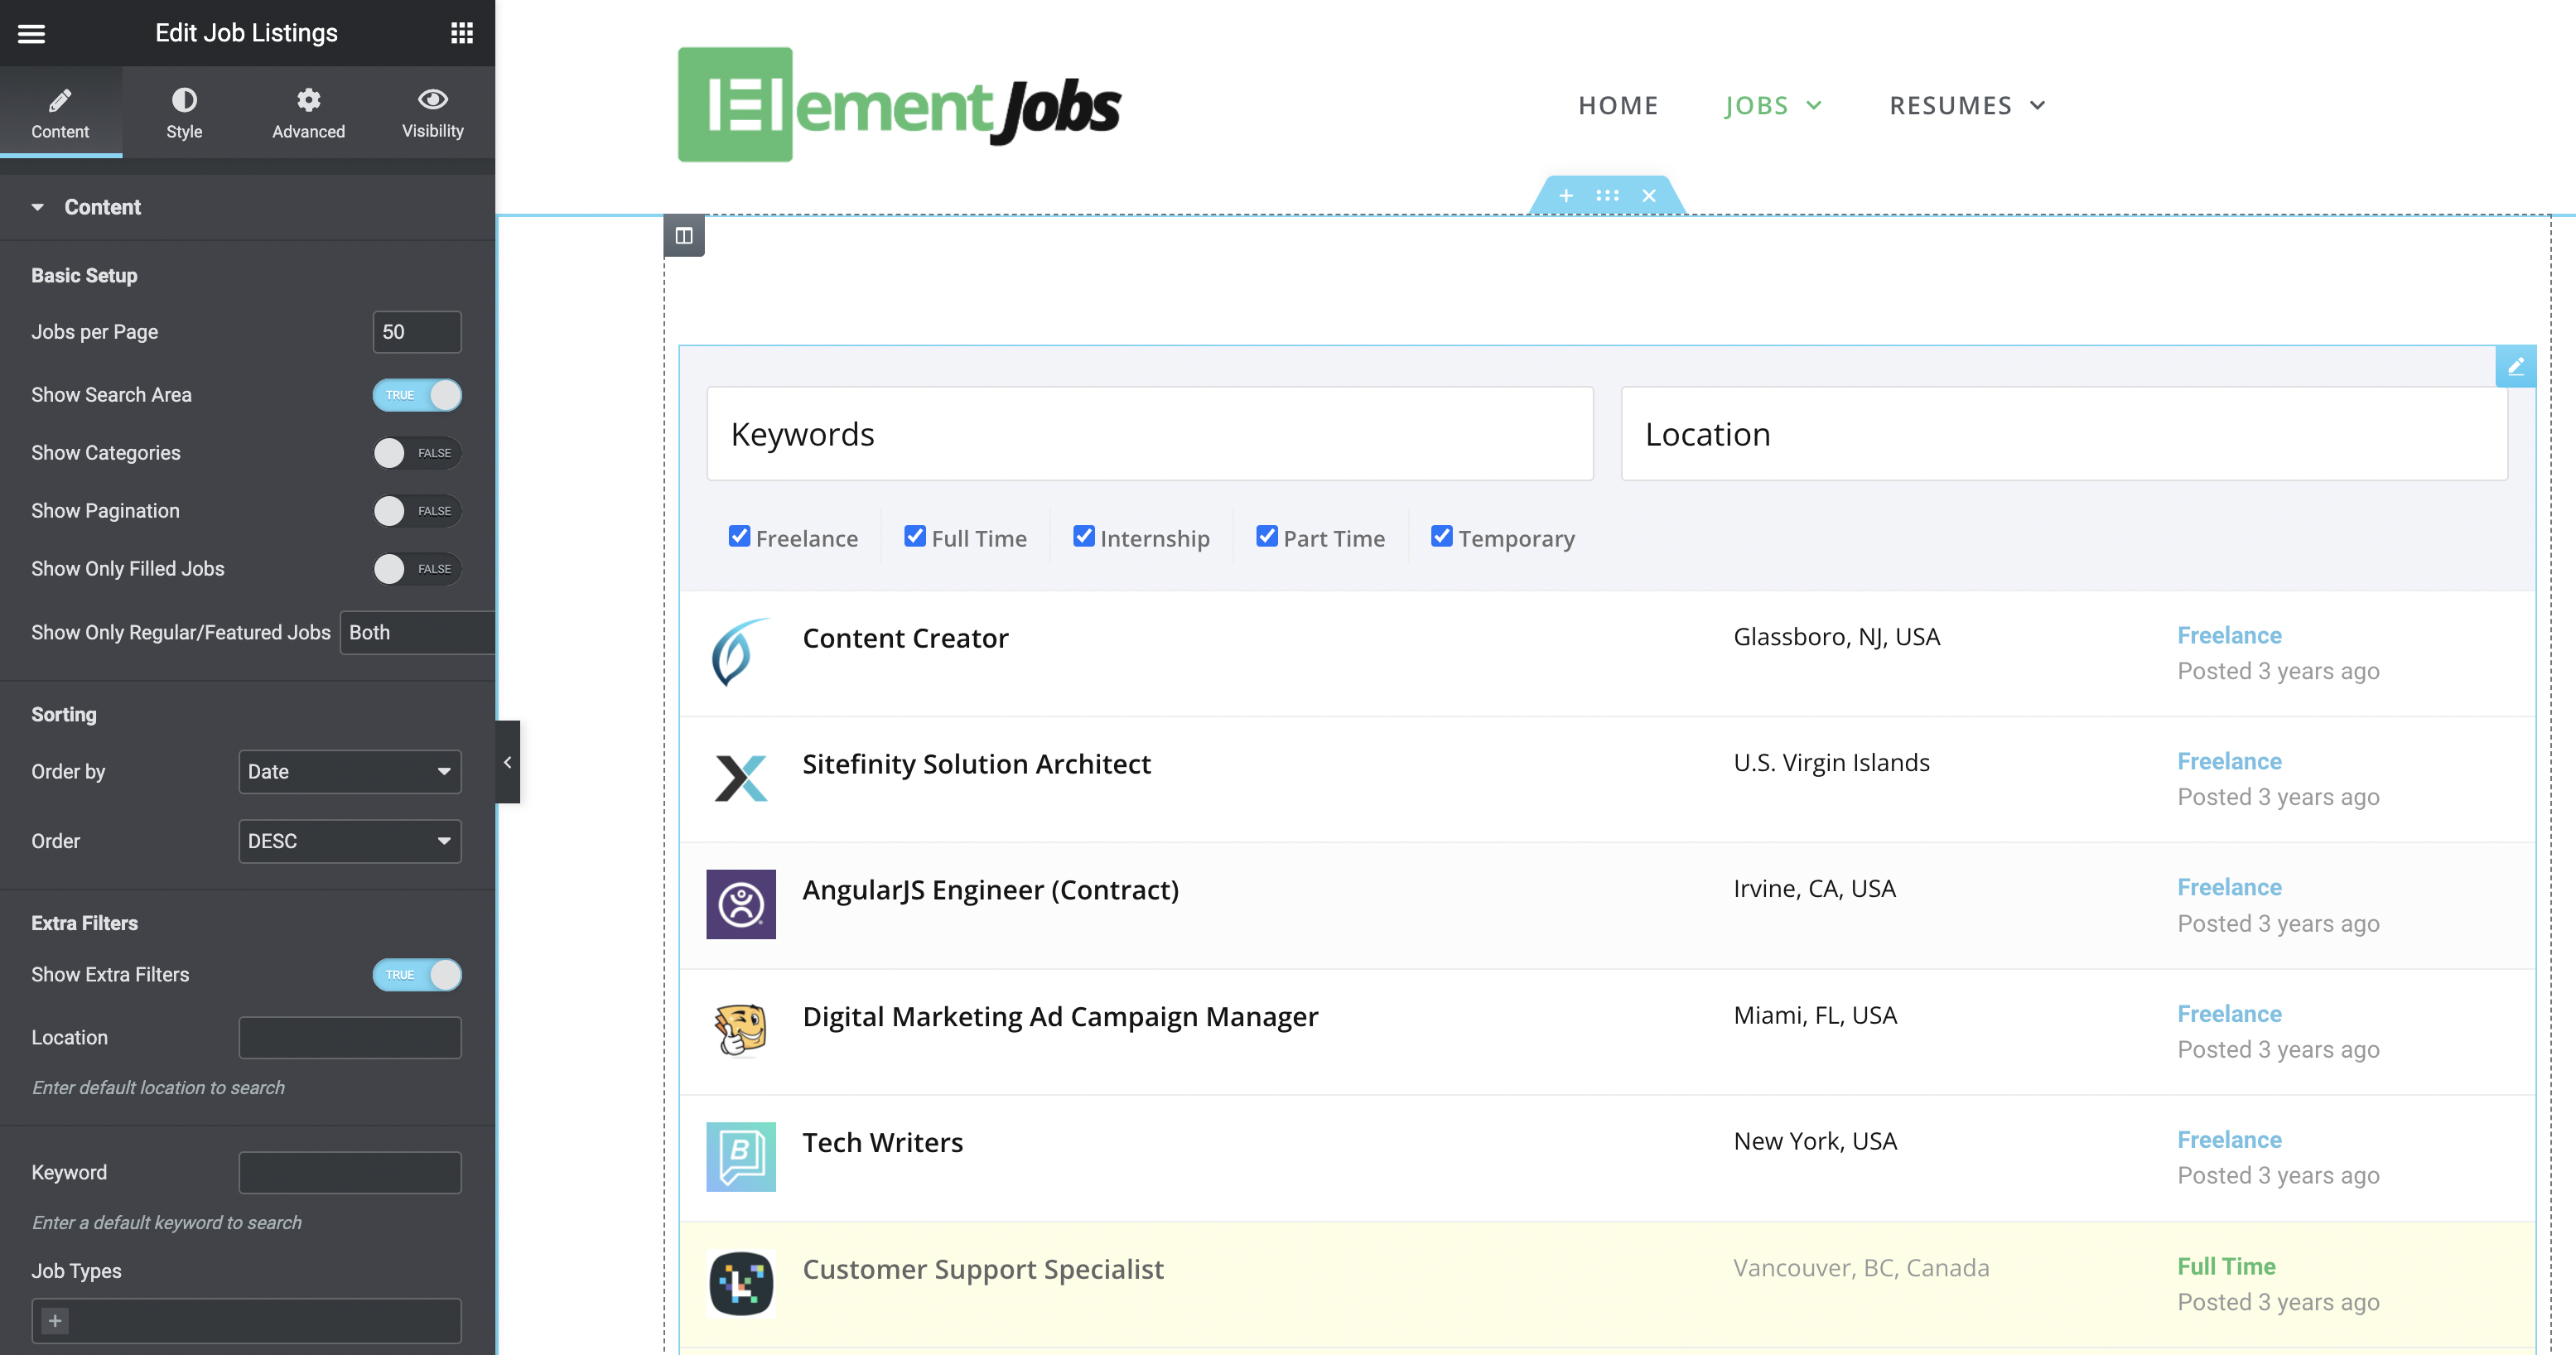
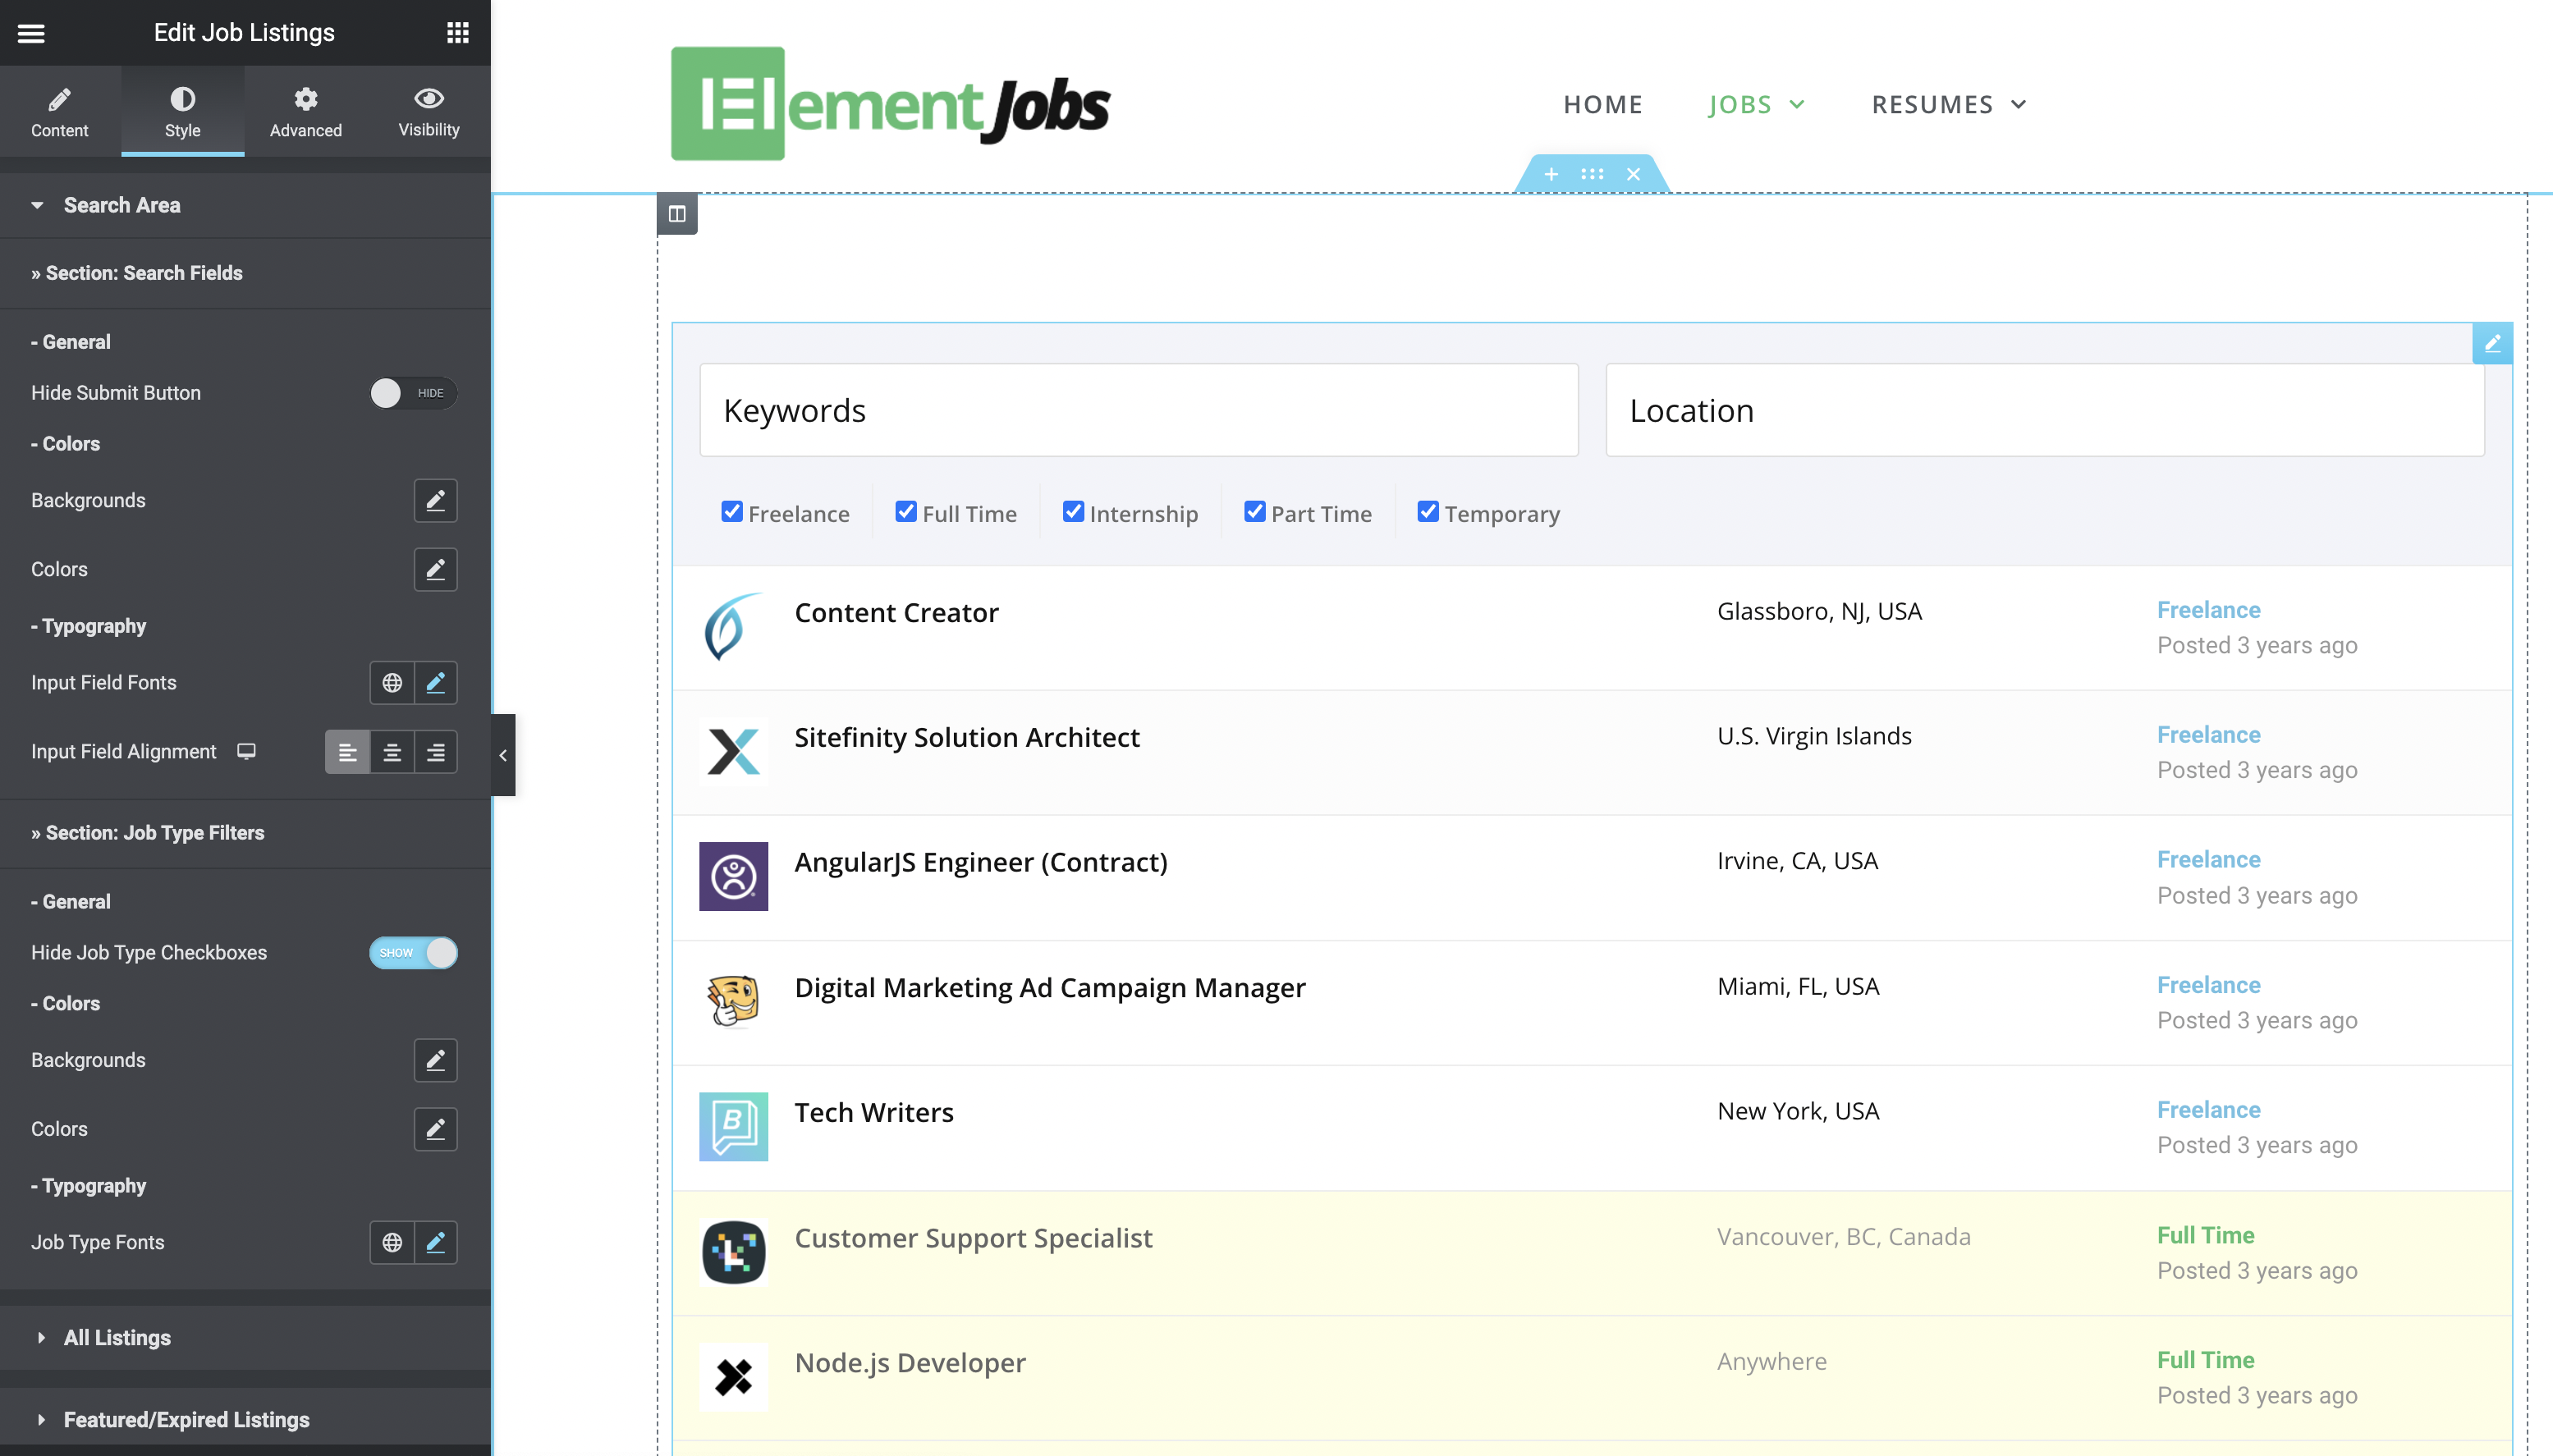
Settings that allows you to modify the design and style of the Job Listings widget – easily grouped for your convenience:
All sub-tabs under the Style Tab mentioned above include options for the Background, Colour, Typography/Fonts, Margin and more – including the ability to toggle the Submit Button on or off. The settings grouped in the sub-tabs include relevant settings options including means to configure the background colour or images, borders, padding margins, font styles, font colours, hover styles and much more! These settings can be configured by clicking on their respective settings areas to tweak the design/layout on the page itself.
Within the All Listings group, you are able to modify the returned listings, including every aspect of how the data is displayed – background, font, colour, spacing, borders, what information to show or hide as well as bringing a splash of colour to each job type.
TYour imagination is the limit!
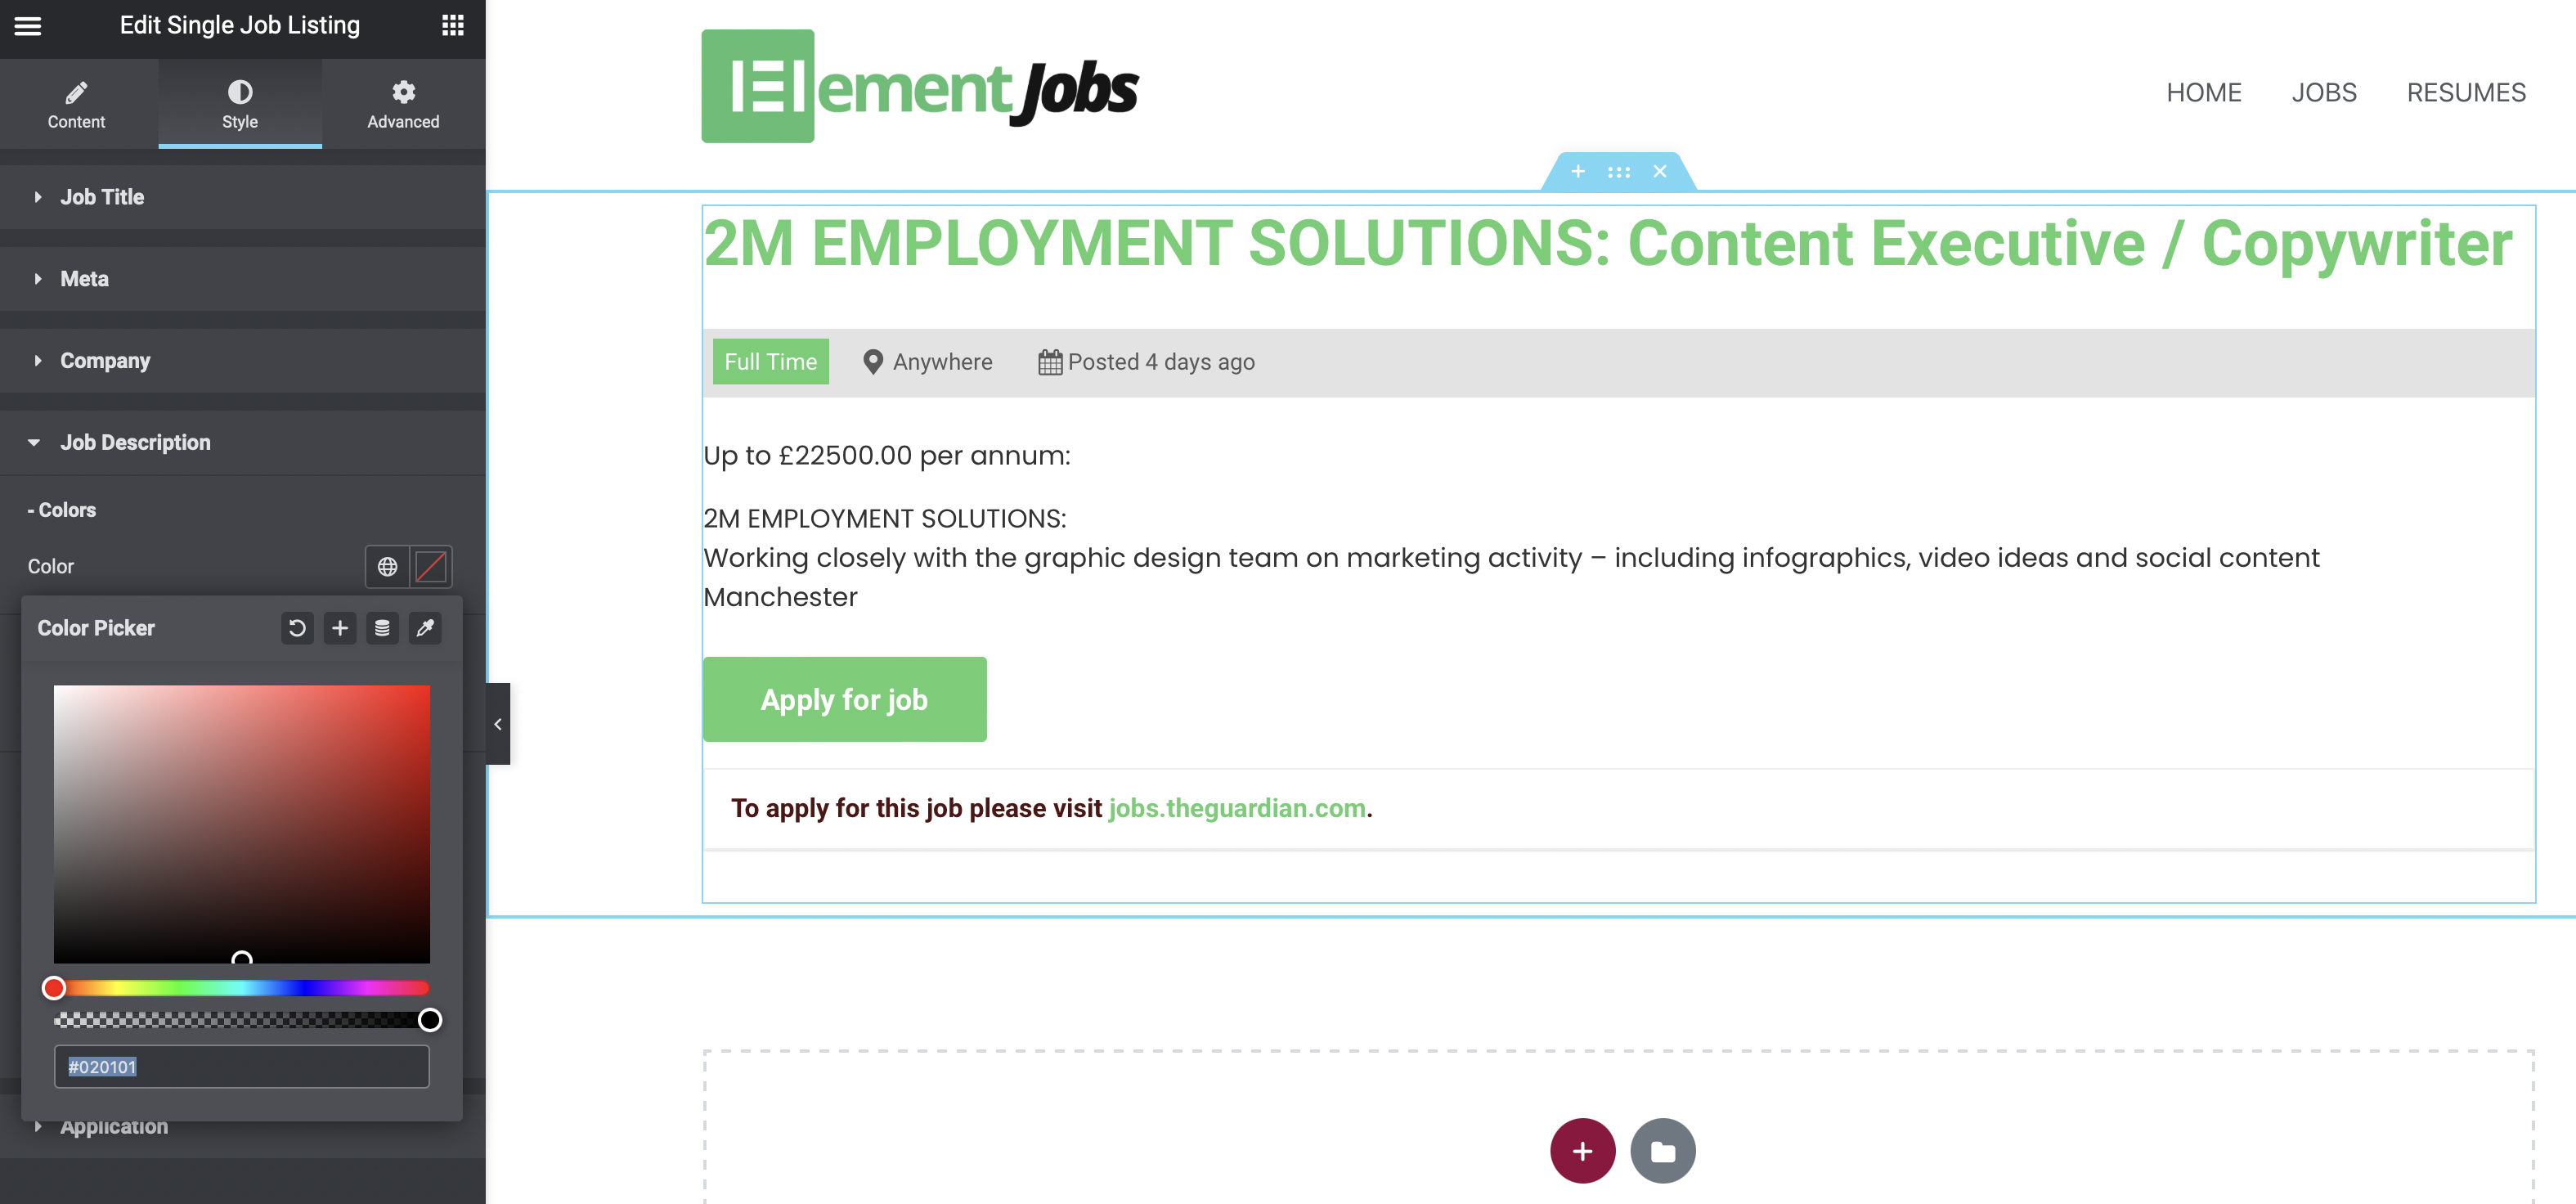
The Single Job Listings widget is used to display a single job on a post/page of your choosing. In order to start styling the single job listing, you will need a Job ID number. The Job ID number is the post number of the single job listing and can be found by following these steps:
?post=1390 (where 1390 is the Job ID number; This will be different on your site)Please note that this widget does not create a template style that applies to all job listings. The widget is only used to pull a view of a single job into your page/post. In order to create / modify a style used for all your Job Listings, please refer to the section Template Builder Widgets.
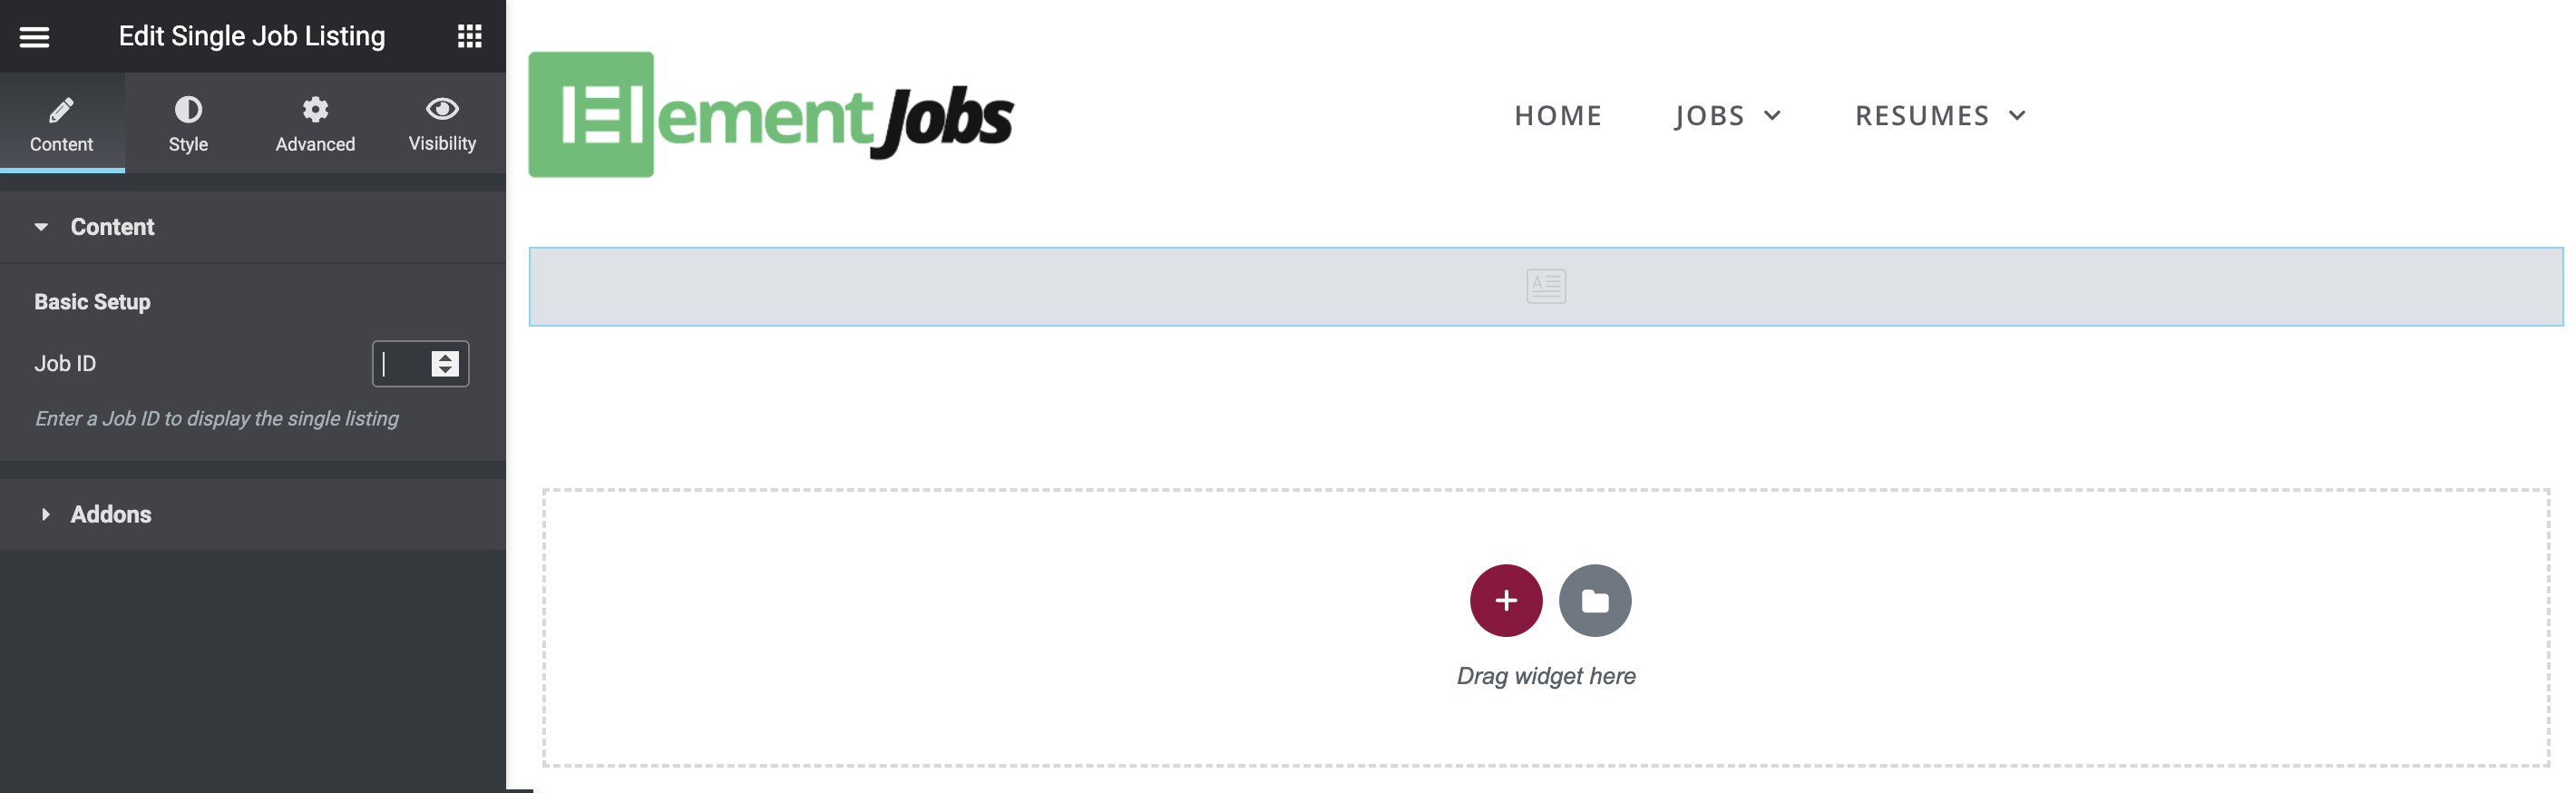
The Single Job Listings widget provides the following options:
Content Tab
Style Tab
Settings that allows you to modify the design and style of the Single Job Listing widget – easily grouped for your convenience:
All sub-tabs under the Style Tab mentioned above include options for the Background, Colour, Typography/Fonts, Margin, Padding, Border and Alignment. These settings can be configured by clicking on their respective settings areas to tweak the design/layout on the page itself.
The Single Job Summary widget is similar to the Single Job Listing widget albeit in a summarised form. In order for this widget to be displayed, you’ll need the Job ID number. To find the Job ID number, follow these steps:
?post=1390 (where 1390 is the Job ID number)Please note that this widget does not create a template style that applies to all job listings. The widget is only used to pull a view of a single job into your page/post. In order to create / modify a style used for all your Job Listings, please refer to the section Template Builder Widgets.
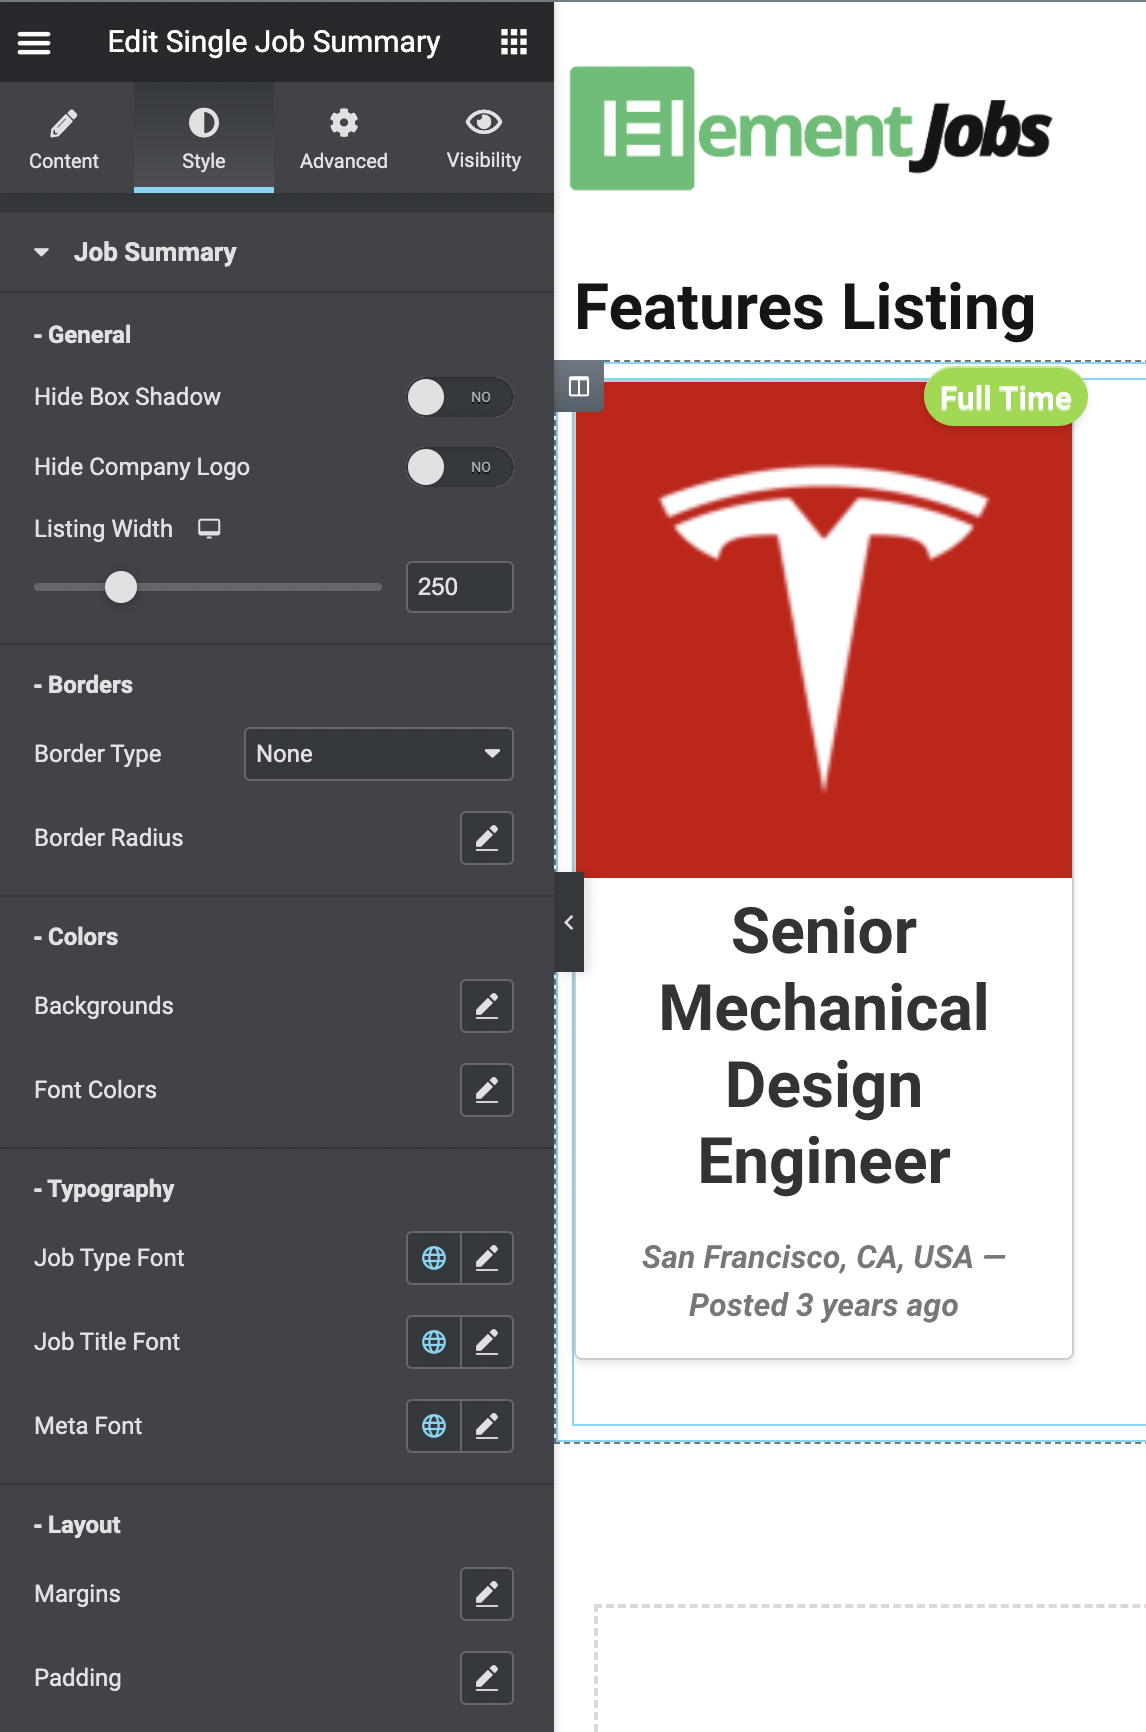
The Single Job Summary widget provides the following options:
Content Tab
Style Tab
As the widget content is only a summary of the Job Listing, the Job Summary sections are all contained under
The configuration under each section allows the user to further define the style, including defining the background, typography, fonts colour, margin, padding, border and size. These settings can be configured by clicking on their respective settings areas to tweak the design/layout on the page itself.
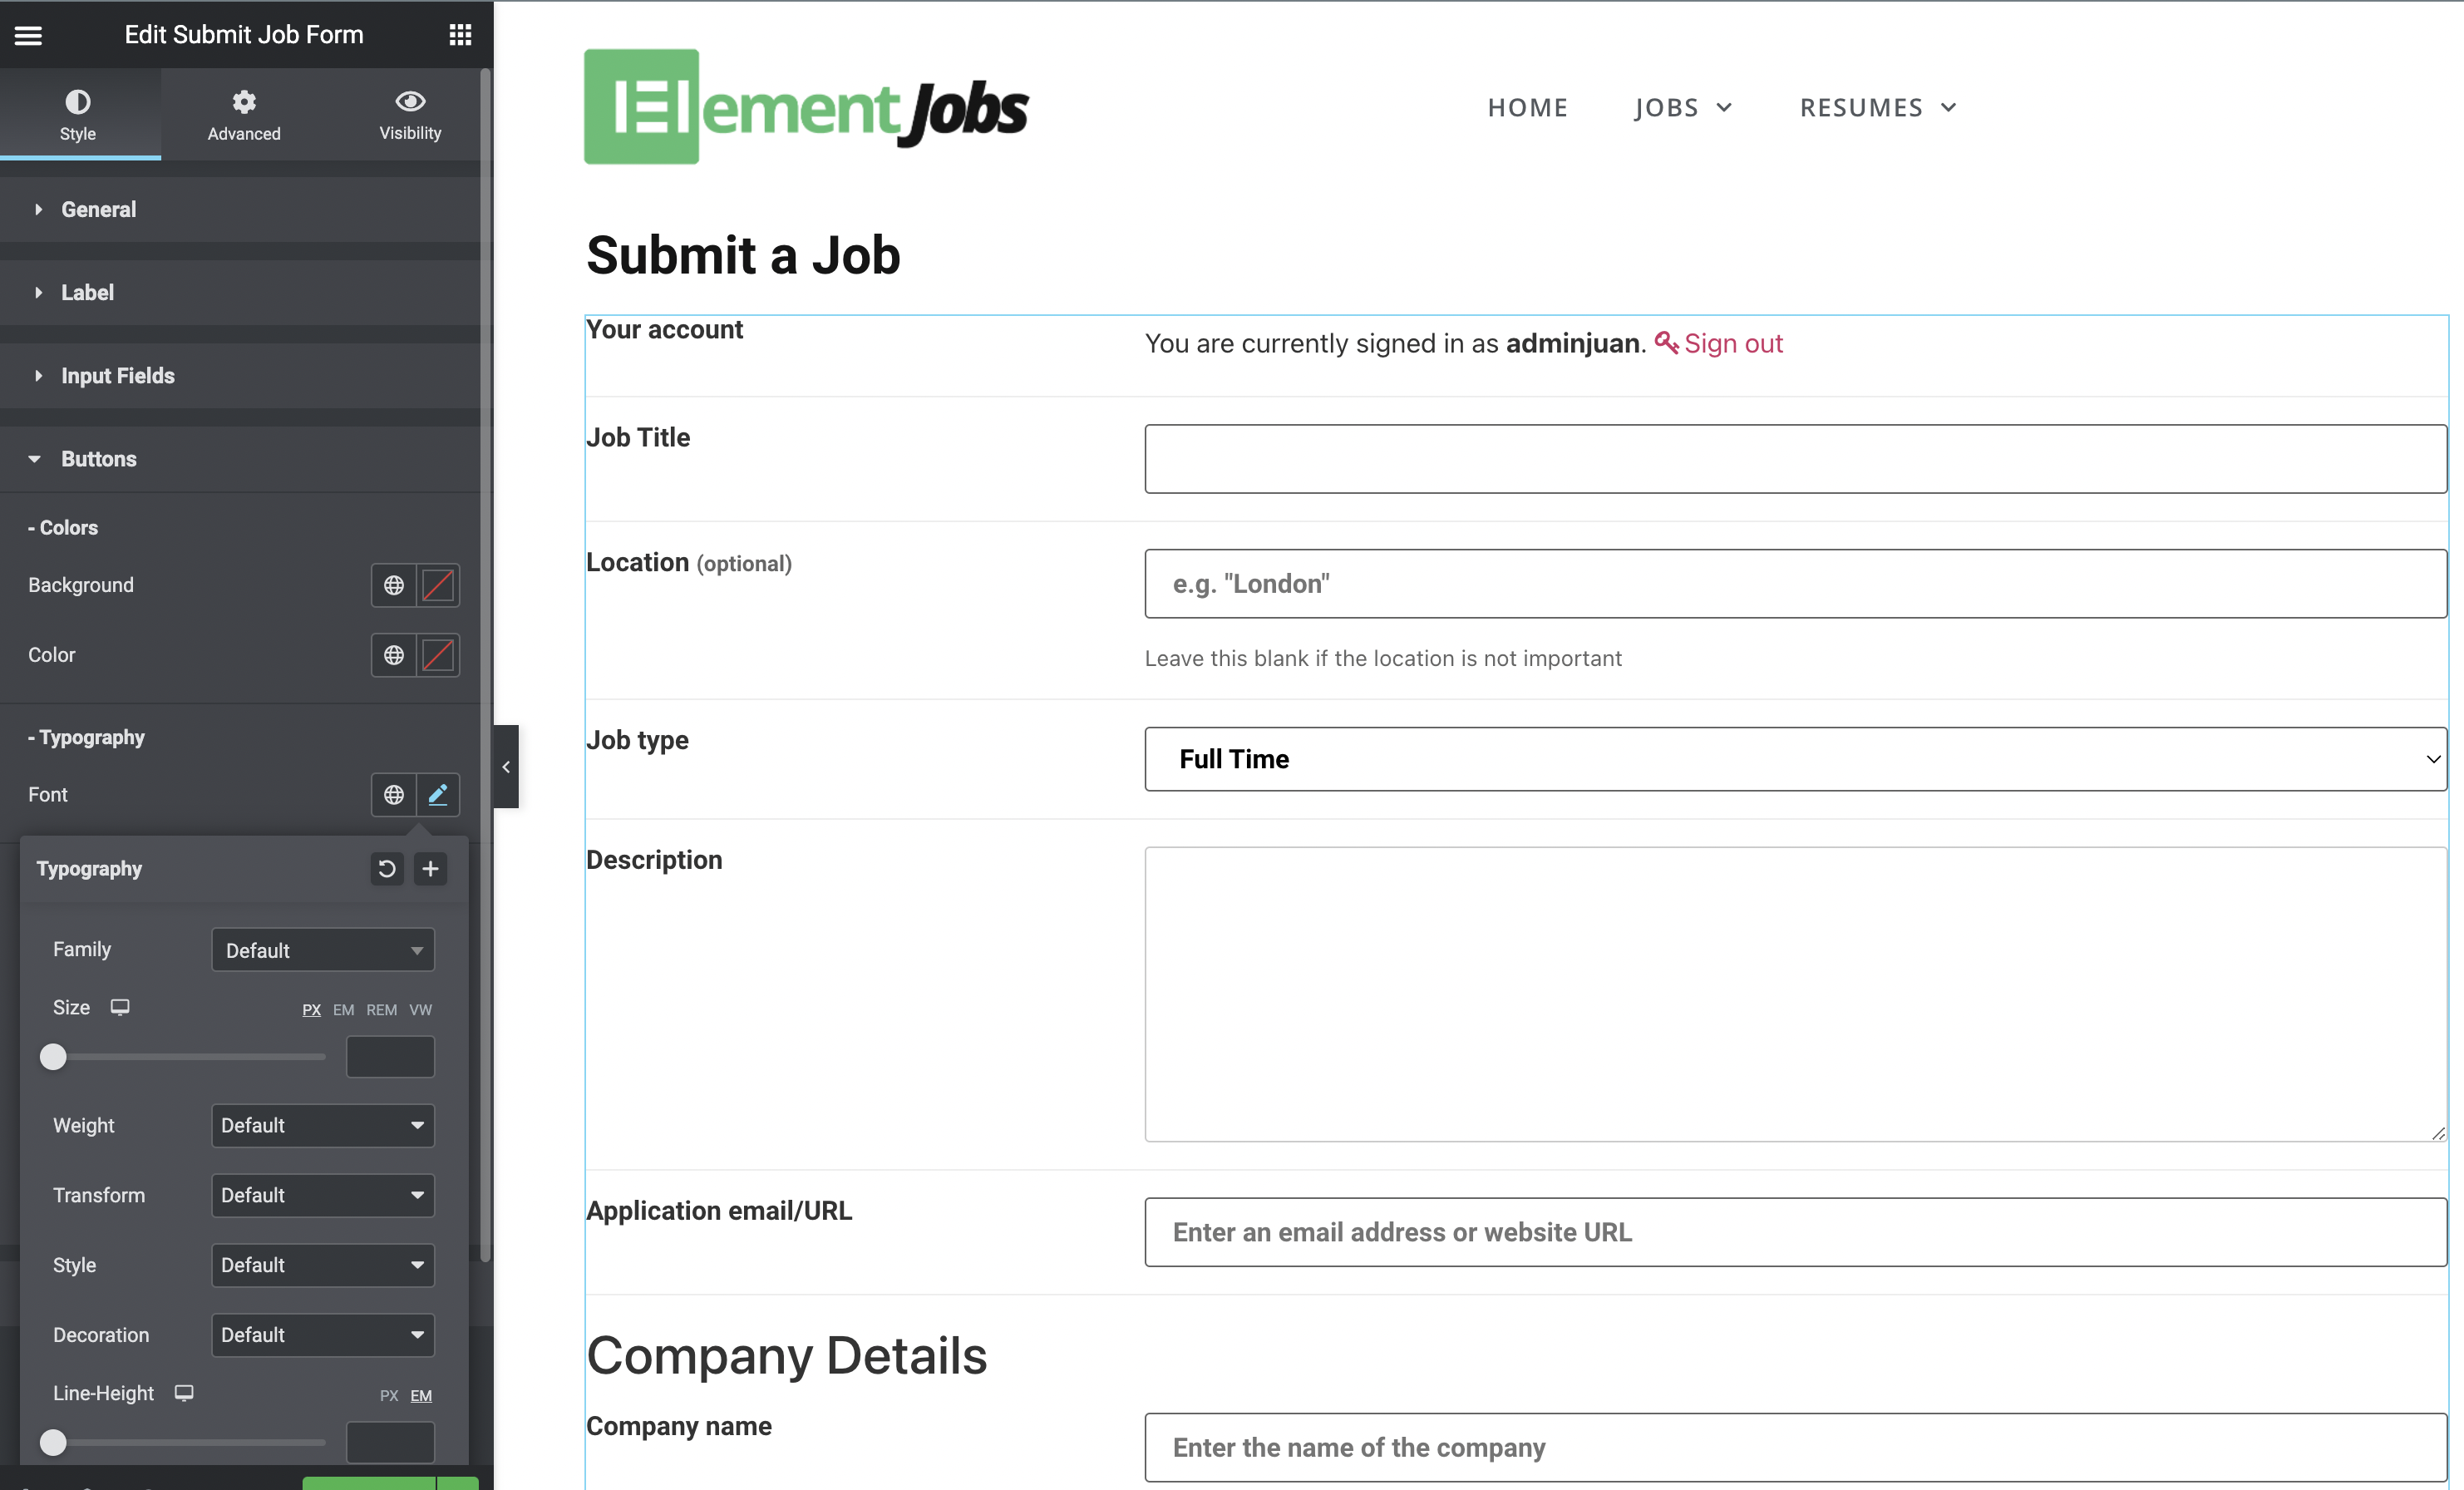
The Submit Job Form widget adds the WP Job Manager submission form to any area using the Elementor page builder. While this widget doesn’t have any content settings of its own, the style tab does allow for the following sections to be configured:
The configuration under each section allows the user to further define the style, including defining the background, typography, fonts colour, margin, padding, border and size. These settings can be configured by clicking on their respective settings areas to tweak the design/layout on the page itself.
The Job Dashboard widget is used to display a list of all active/expired jobs on the front-end for the logged-in user. In order for this widget to be displayed, you’ll to select a number of jobs to be displayed on the dashboard page by defining this on the Content Tab. Then you can style the dashboard accordingly in the Style Tab.
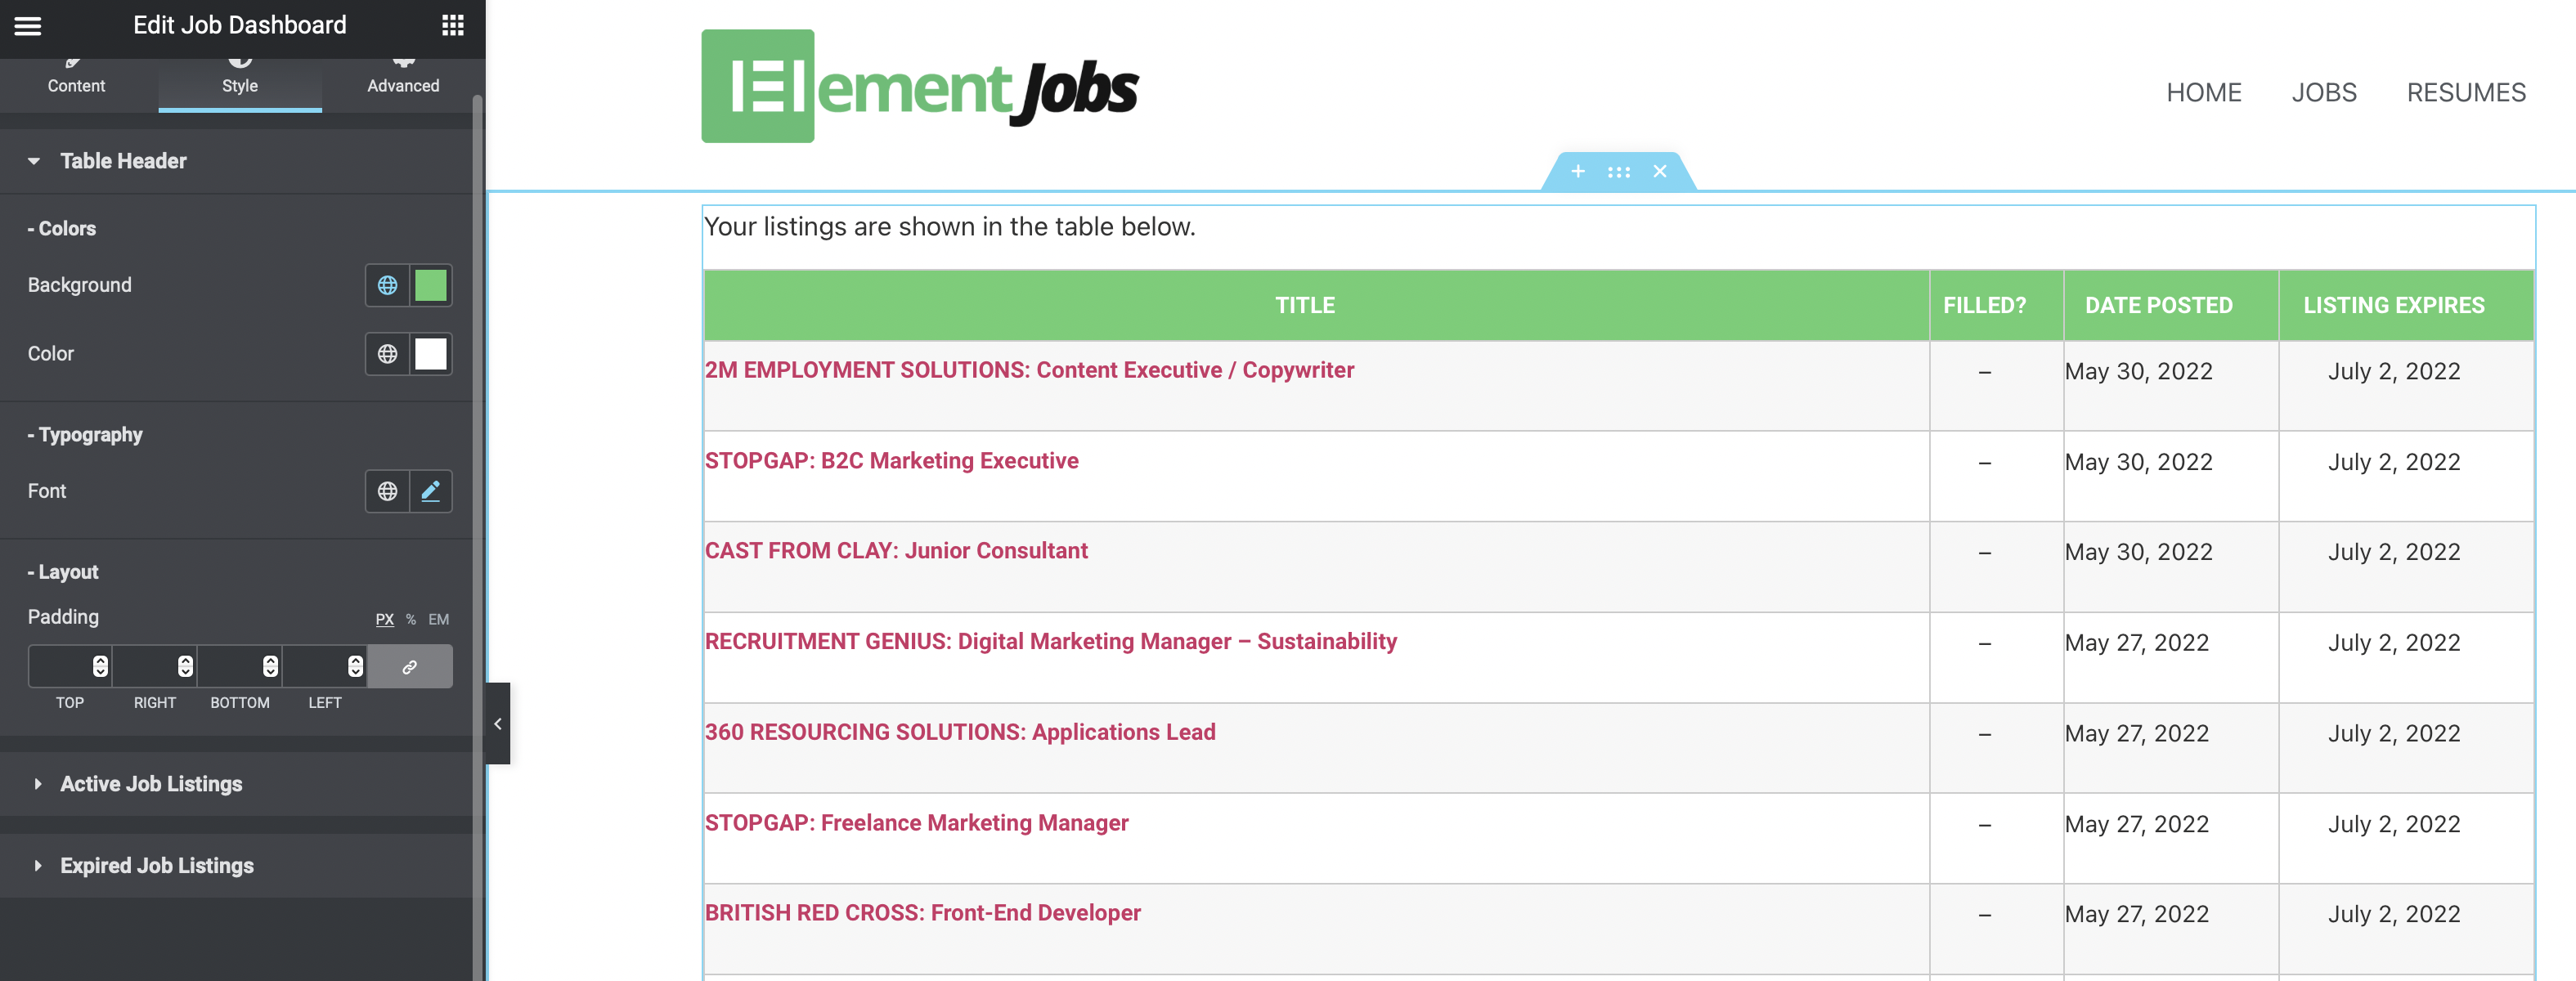
The Job Dashboard widget provides the following options:
Content Tab
Style Tab
Elementor Pro allows users to build custom dynamic pages and templates. Users can build or customise their own dynamic Jobs Template using the advanced widgets in Elementor Connector for Job Manager. The section below describes the various widgets that can be utilised in constructing and saving a custom Jobs Template to be used when displaying each of the job boards.
Please note: ensure Elementor Pro is installed, active and connected with an active license to access the Template Builder functionality.
The Single Job Title widget allows you to place and style the dynamic job listing title in instances where a custom layout for the single job listing page is required.
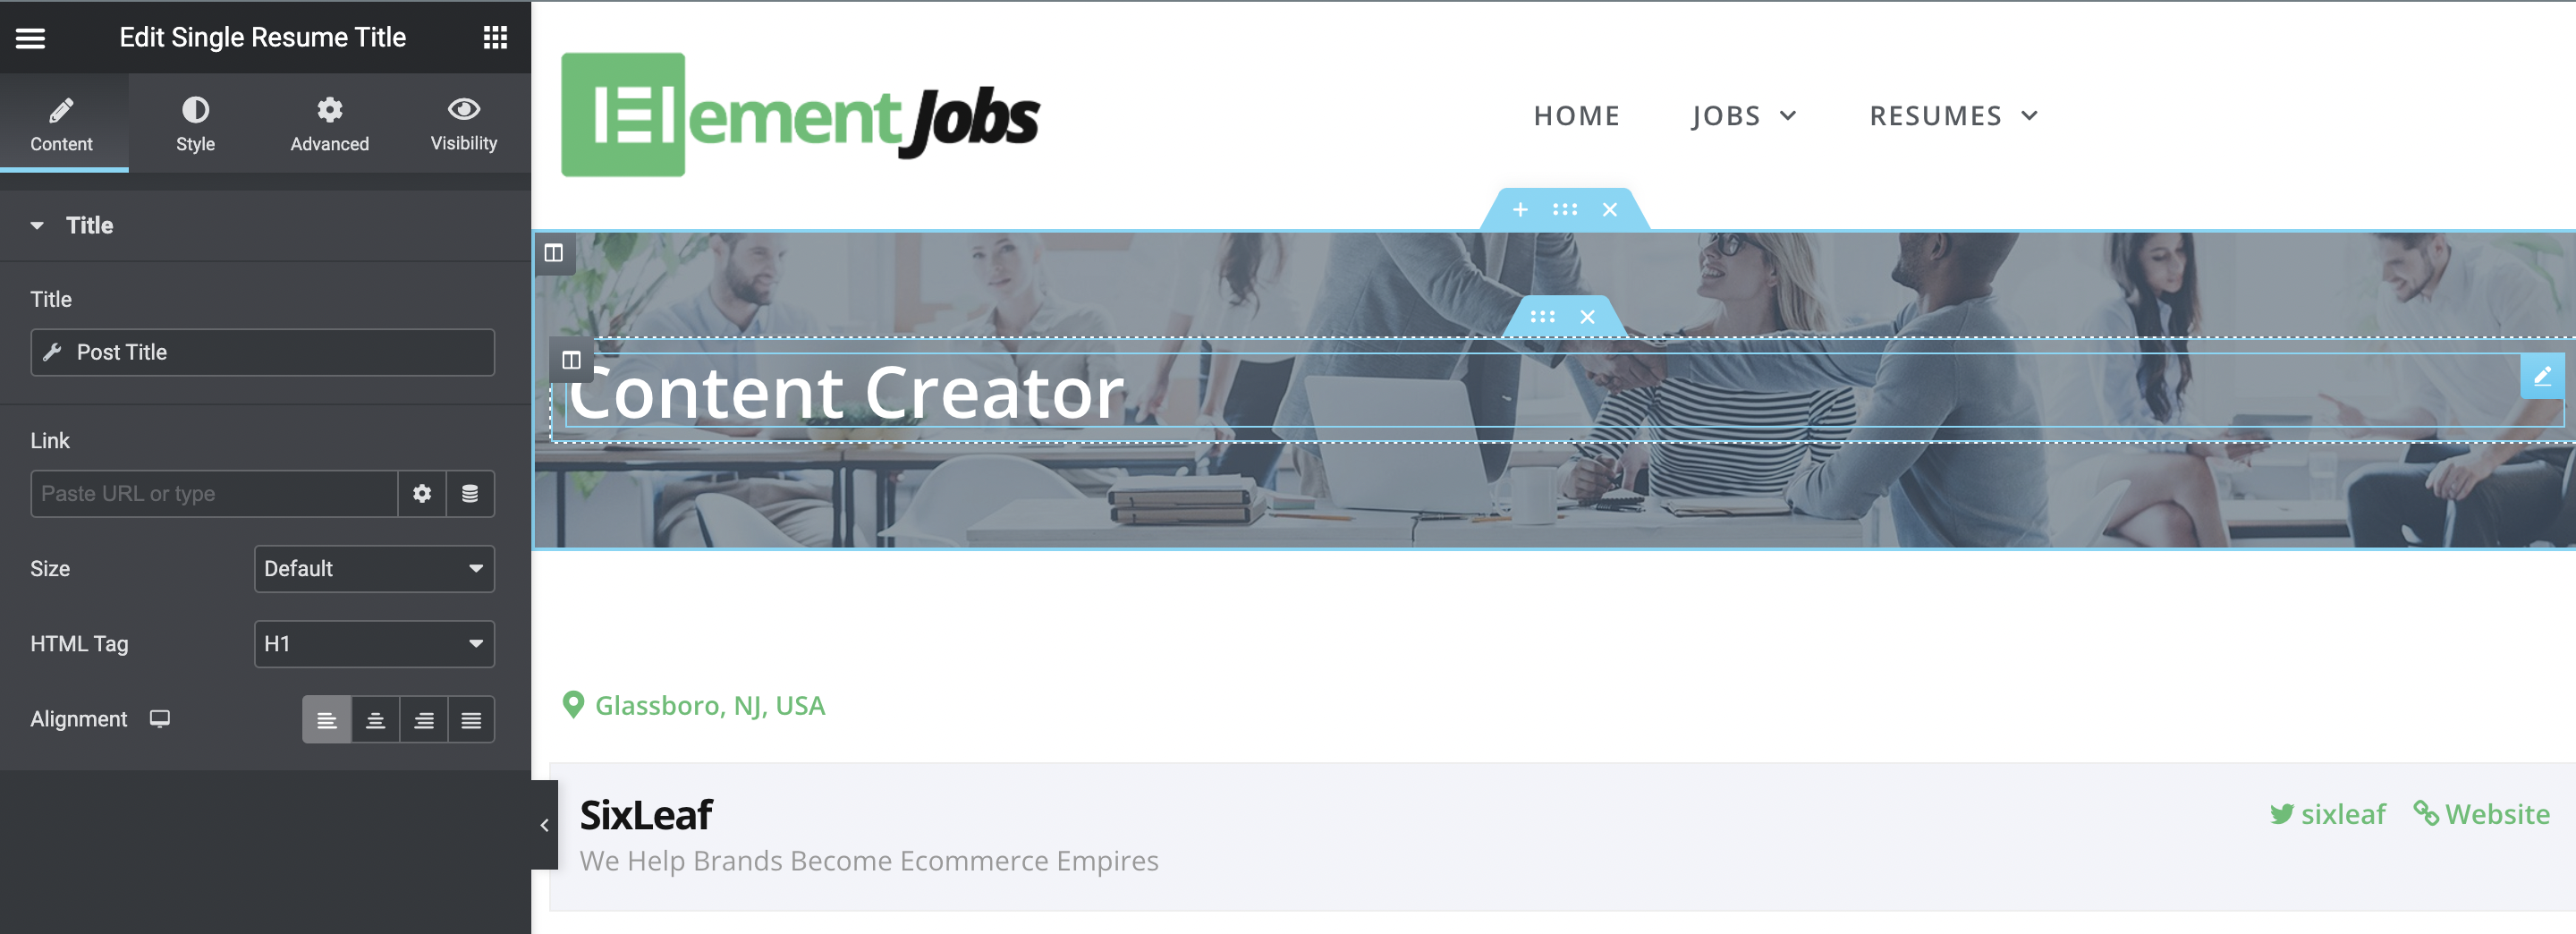
Once a widget has been added to the template, the widget settings panel will appear on the left with the following options:
Content Tab
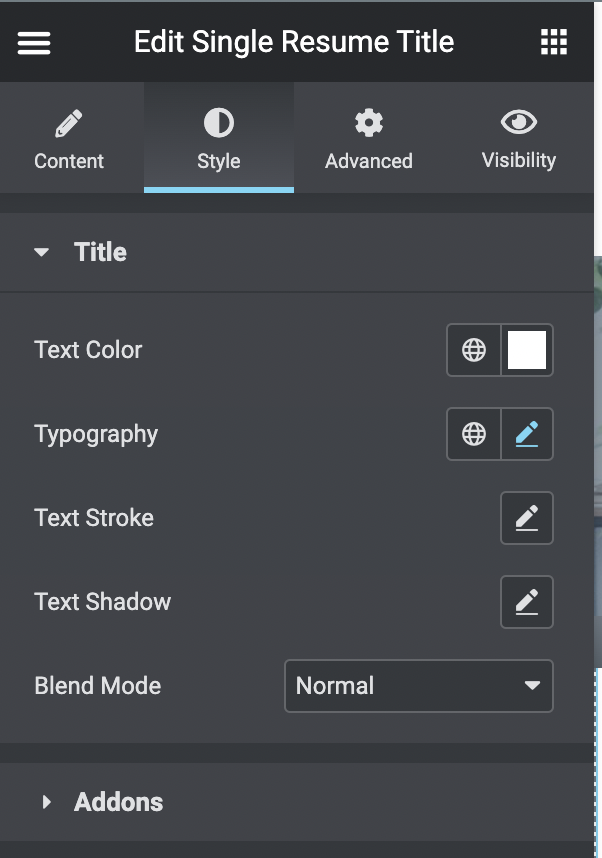
Style Tab
The Single Job Meta widget adds the meta information (Job type, location, listing date, company logo, company name, company tagline and twitter & website links) in your unique template design and allows you to style the elements accordingly.
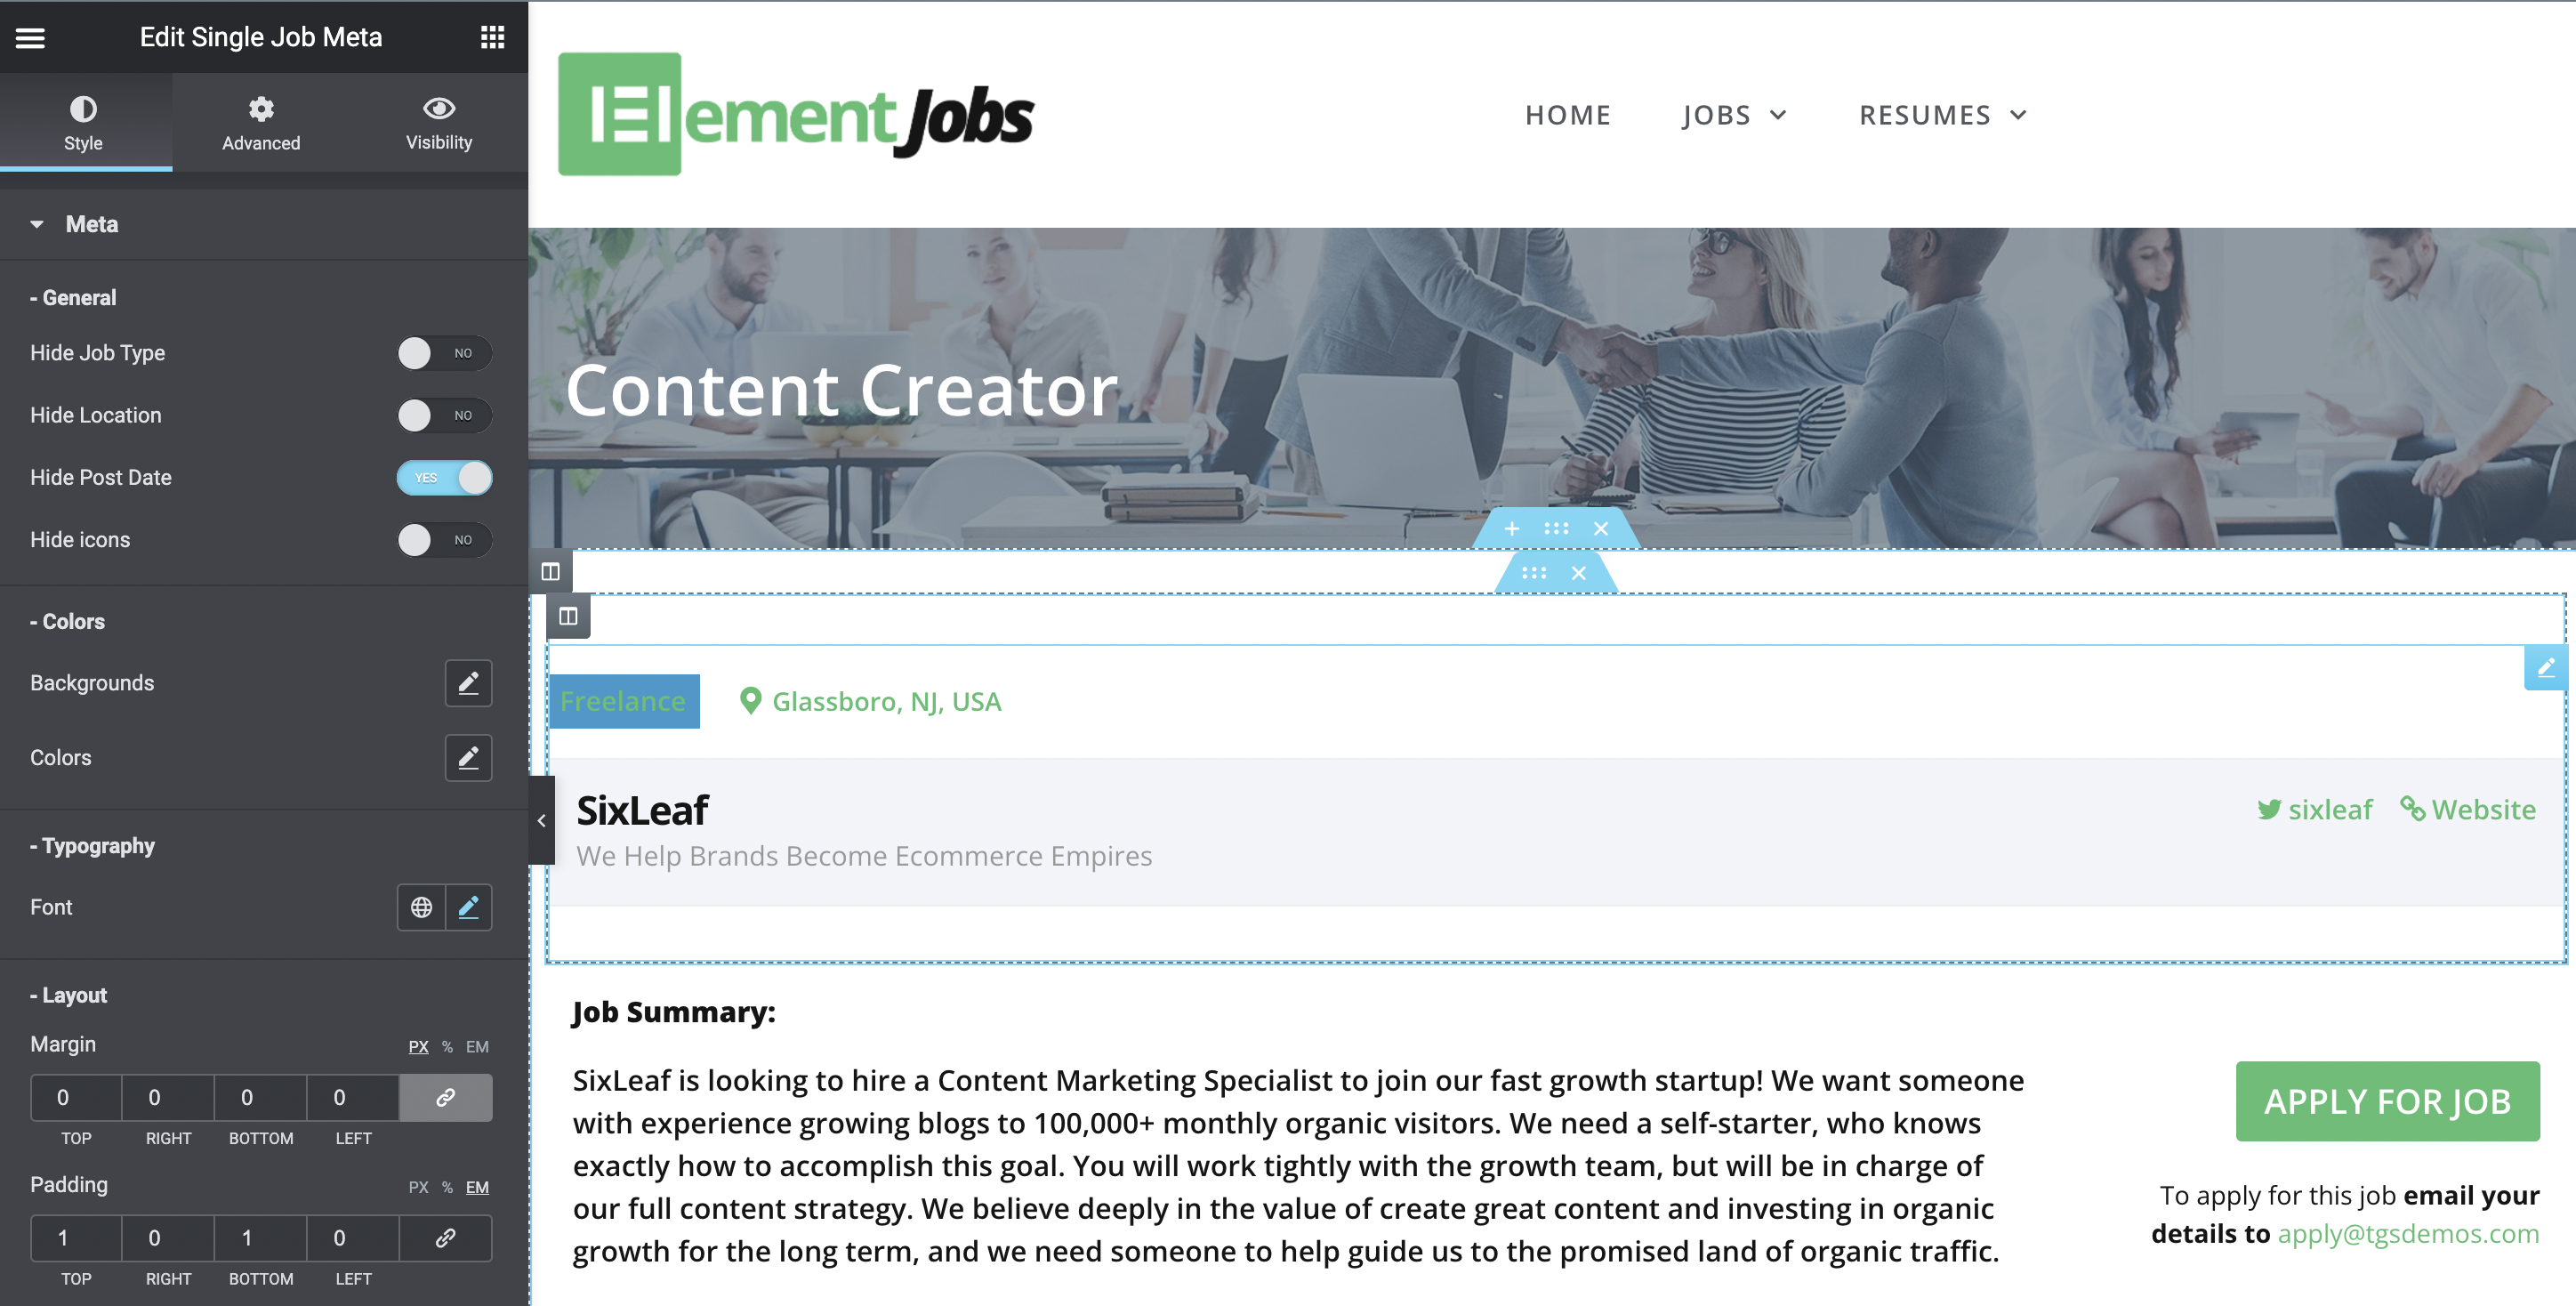
Once the Single Job Meta widget has been added to the template, the widget style settings panel will appear on the left with the following options:
Style Tab
The configuration options under each of these sections include settings to define the backgrounds, font colour, typography/fonts used and layout, element visibility (including location, icons, job types, post dates and more), margin, padding, border and alignment. These settings can be configured by clicking on their respective settings areas to tweak the design/layout on the meta section itself.
Similar to the Single Job Title and Single Job Meta widgets, the Single Job Content widget aims to add the job listing description with uniquely styled layout & design.
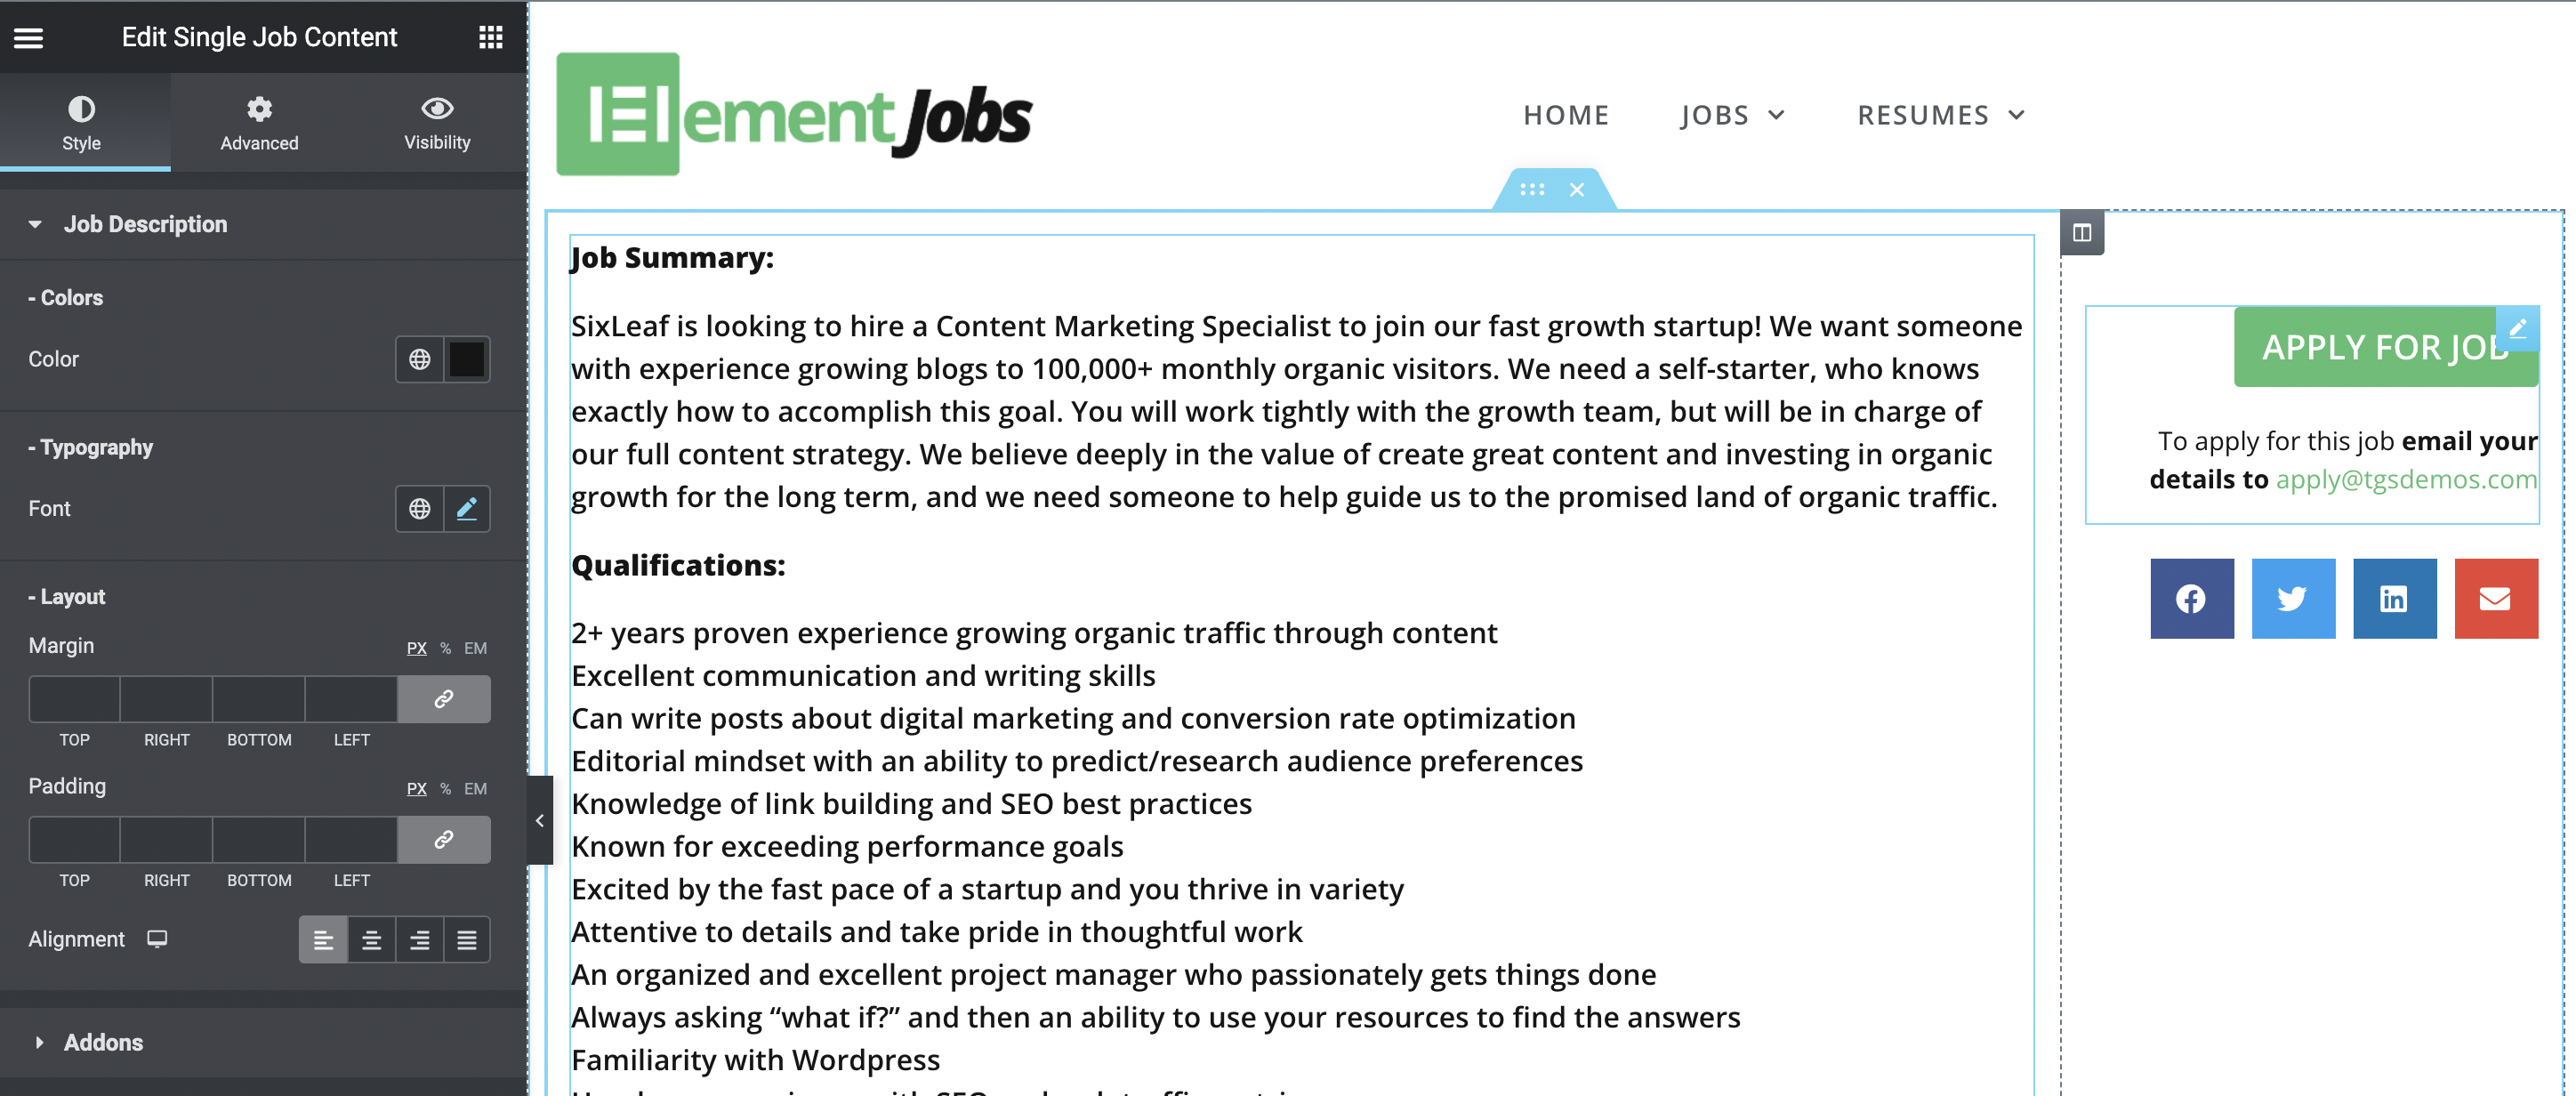
Once the Single Job Description widget has been added to the template, the widget style settings panel will appear on the left with the options to style the Job Description sections, including:
The Single Job Application widget adds the application button to the single job listing page and allows for a custom layout & design.
Once the Single Job Application widget has been added to the template, the widget style settings panel will appear on the left with the following options:
Style Tab
The sub-tabs include options for the background, color, font, margin, padding and alignment.
By default, the Job Preview section following job submission will draw its design/layout from the WP Job Manager plugin directly unless an additional Advanced Preview widget is added to the Job Submission page. For custom styles/layout of the job preview page following submission, please for these steps:
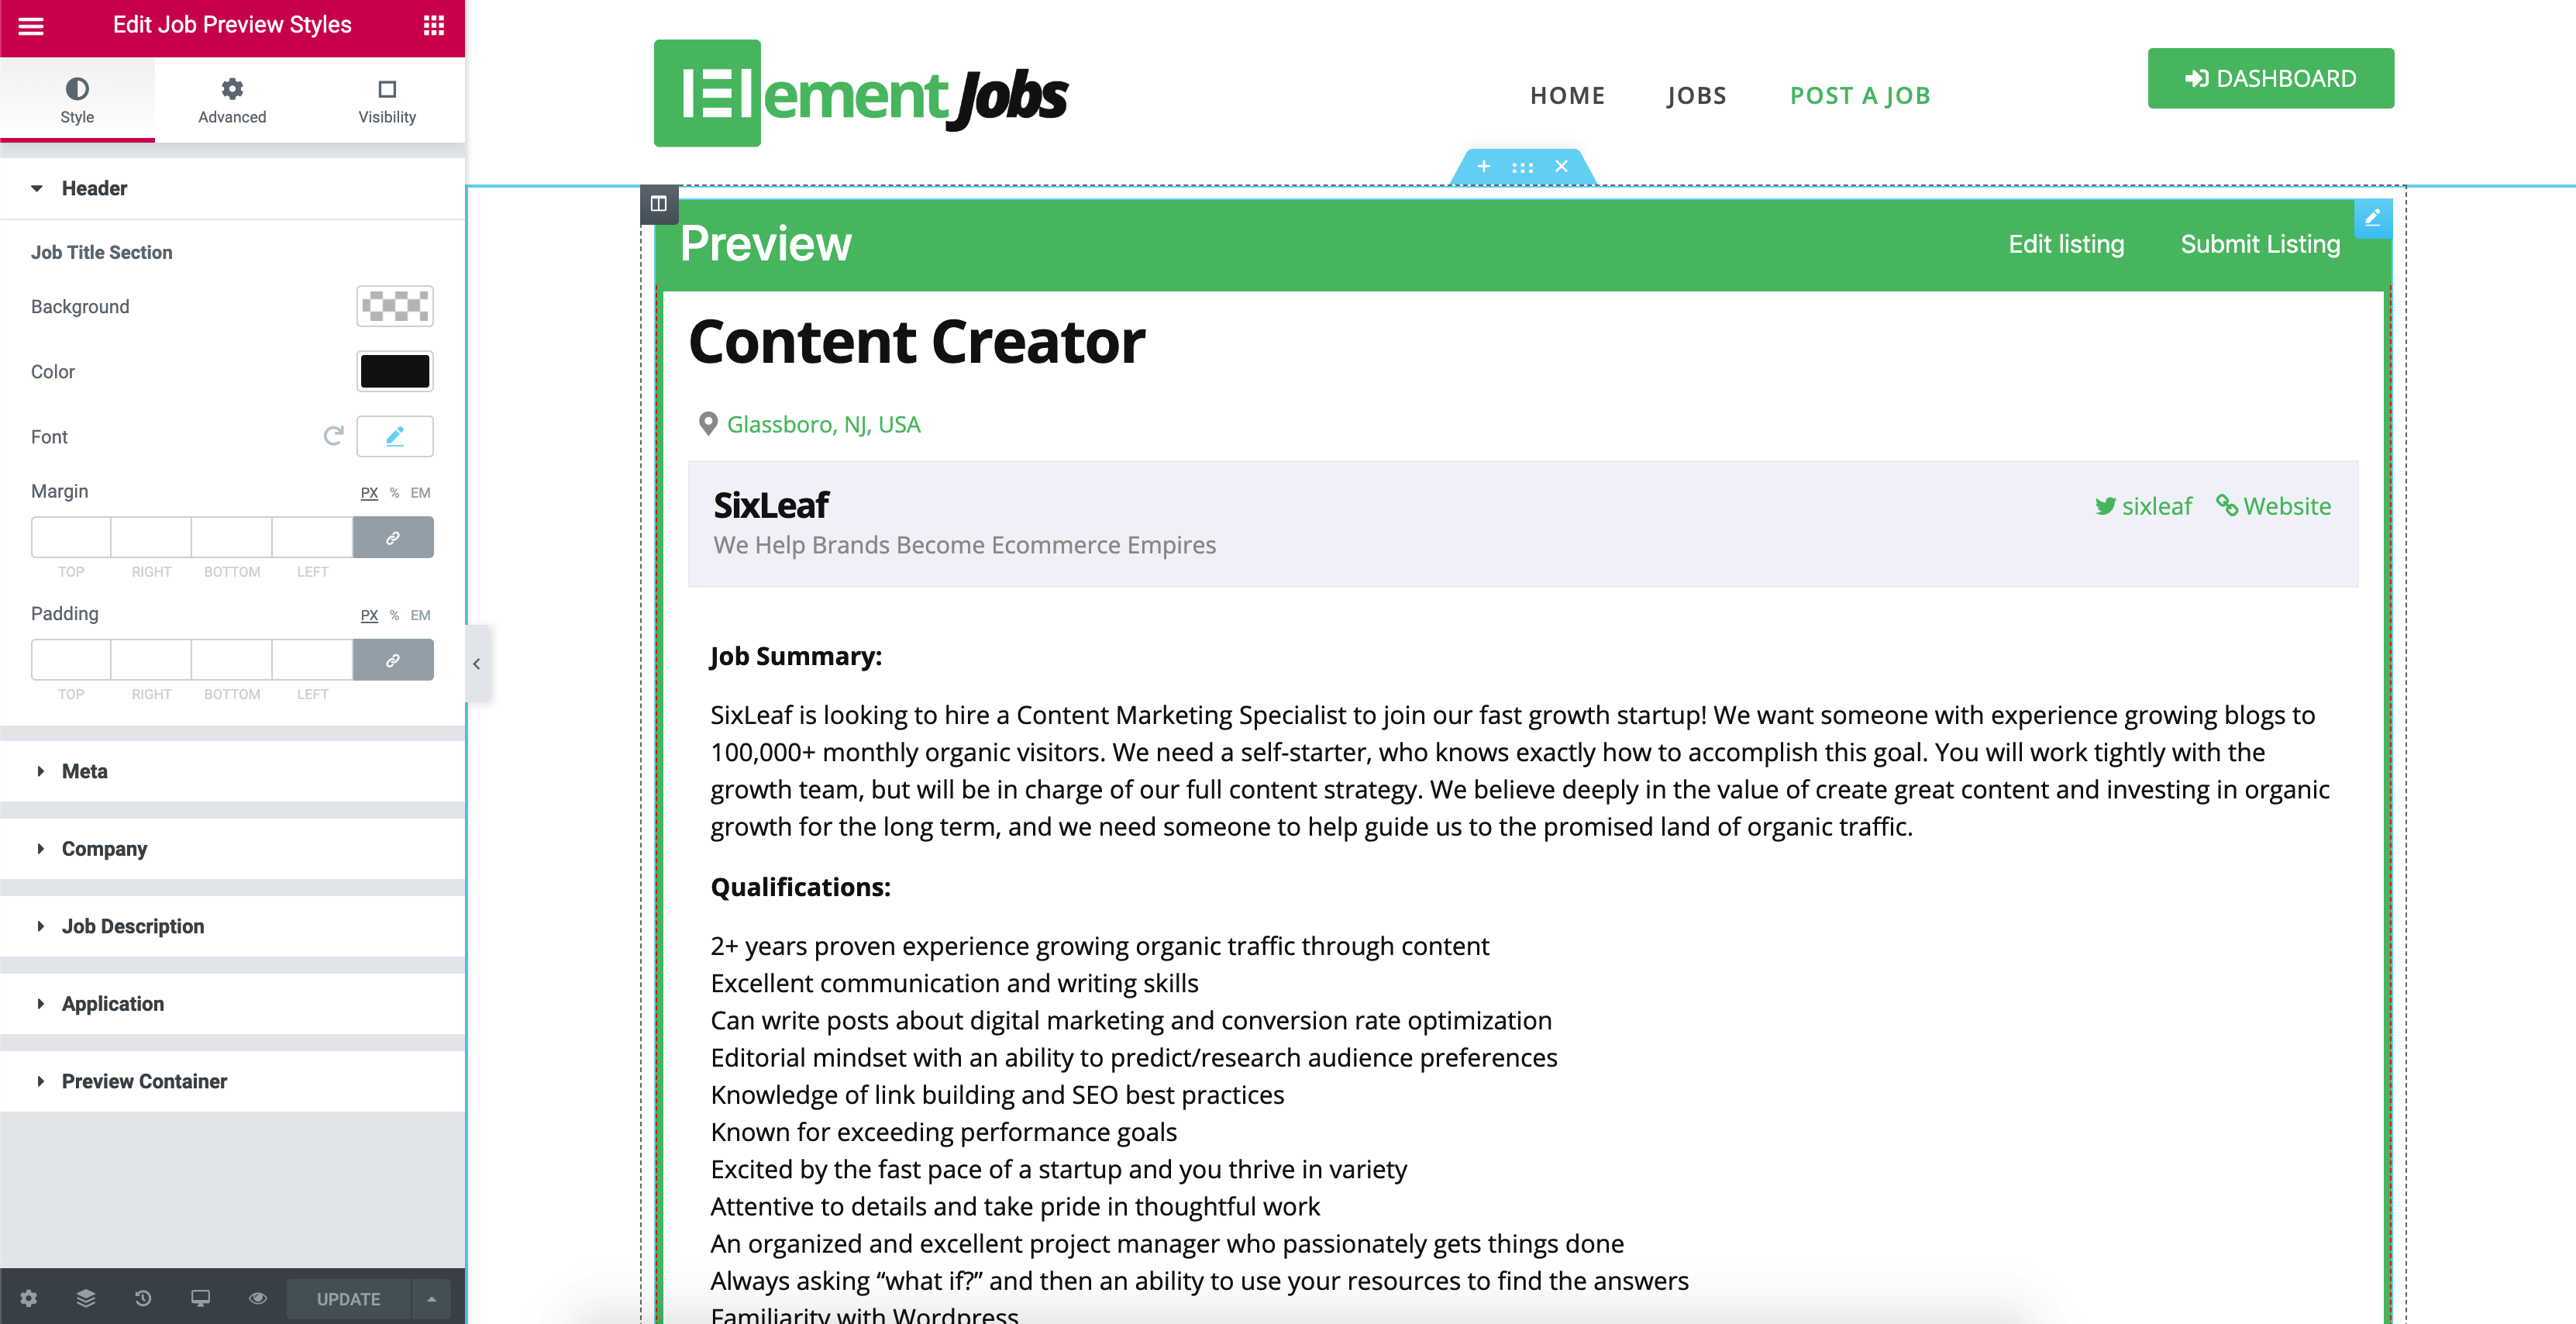
Once the Job Preview Styles widget has been added to the page, the widget style settings panel will appear on the left with the following options:
Style Tab
All sub-tabs under the Style Tab mentioned above include options for the Background, Colour, Typography/Fonts, Margin, Padding and Border. These settings can be configured by clicking on their respective settings areas to tweak the design/layout on the page itself.
By default, the Edit Job Form that’s triggered from the Job Dashboard will draw its design/layout from the WP Job Manager plugin directly unless an additional Advanced Edit Job Form widget is added to the Job Dashboard page. For custom styles/layout of the edit job page, please for these steps:
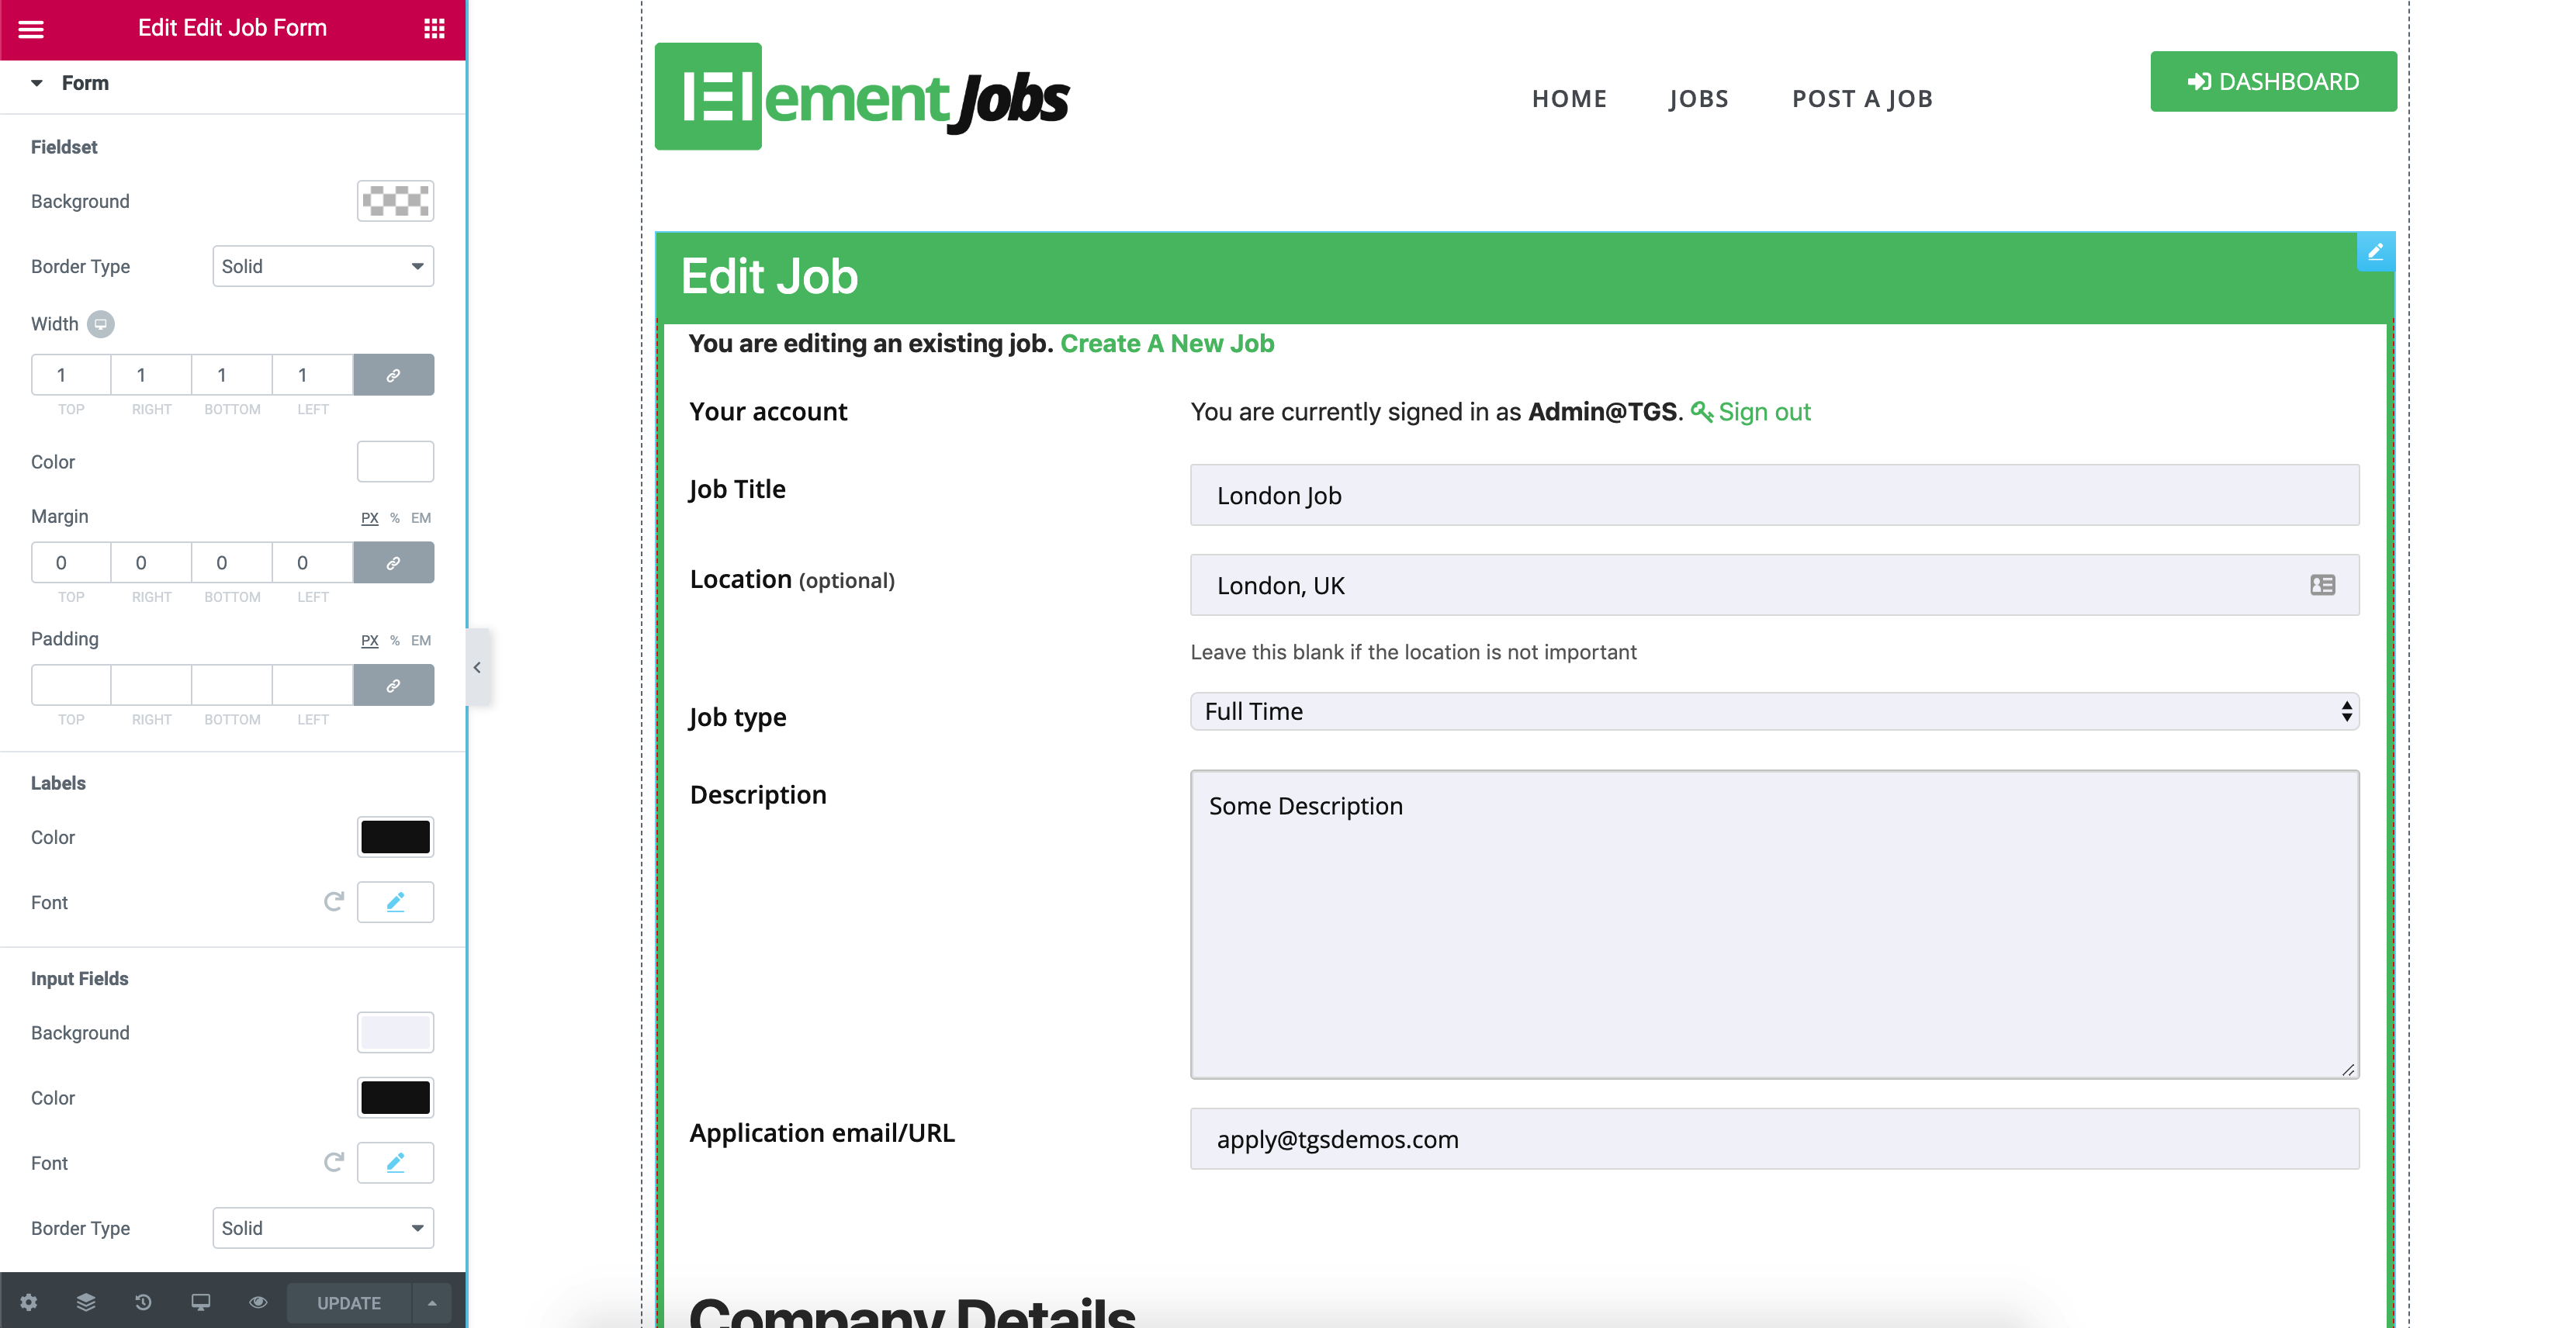
Once the Edit Job Form widget has been added to the page, the widget style settings panel will appear on the left with the following options:
Style Tab
All sub-tabs under the Style Tab mentioned above include options for the Background, Colour, Typography/Fonts, Margin, Padding and Border. These settings can be configured by clicking on their respective settings areas to tweak the design/layout on the page itself.
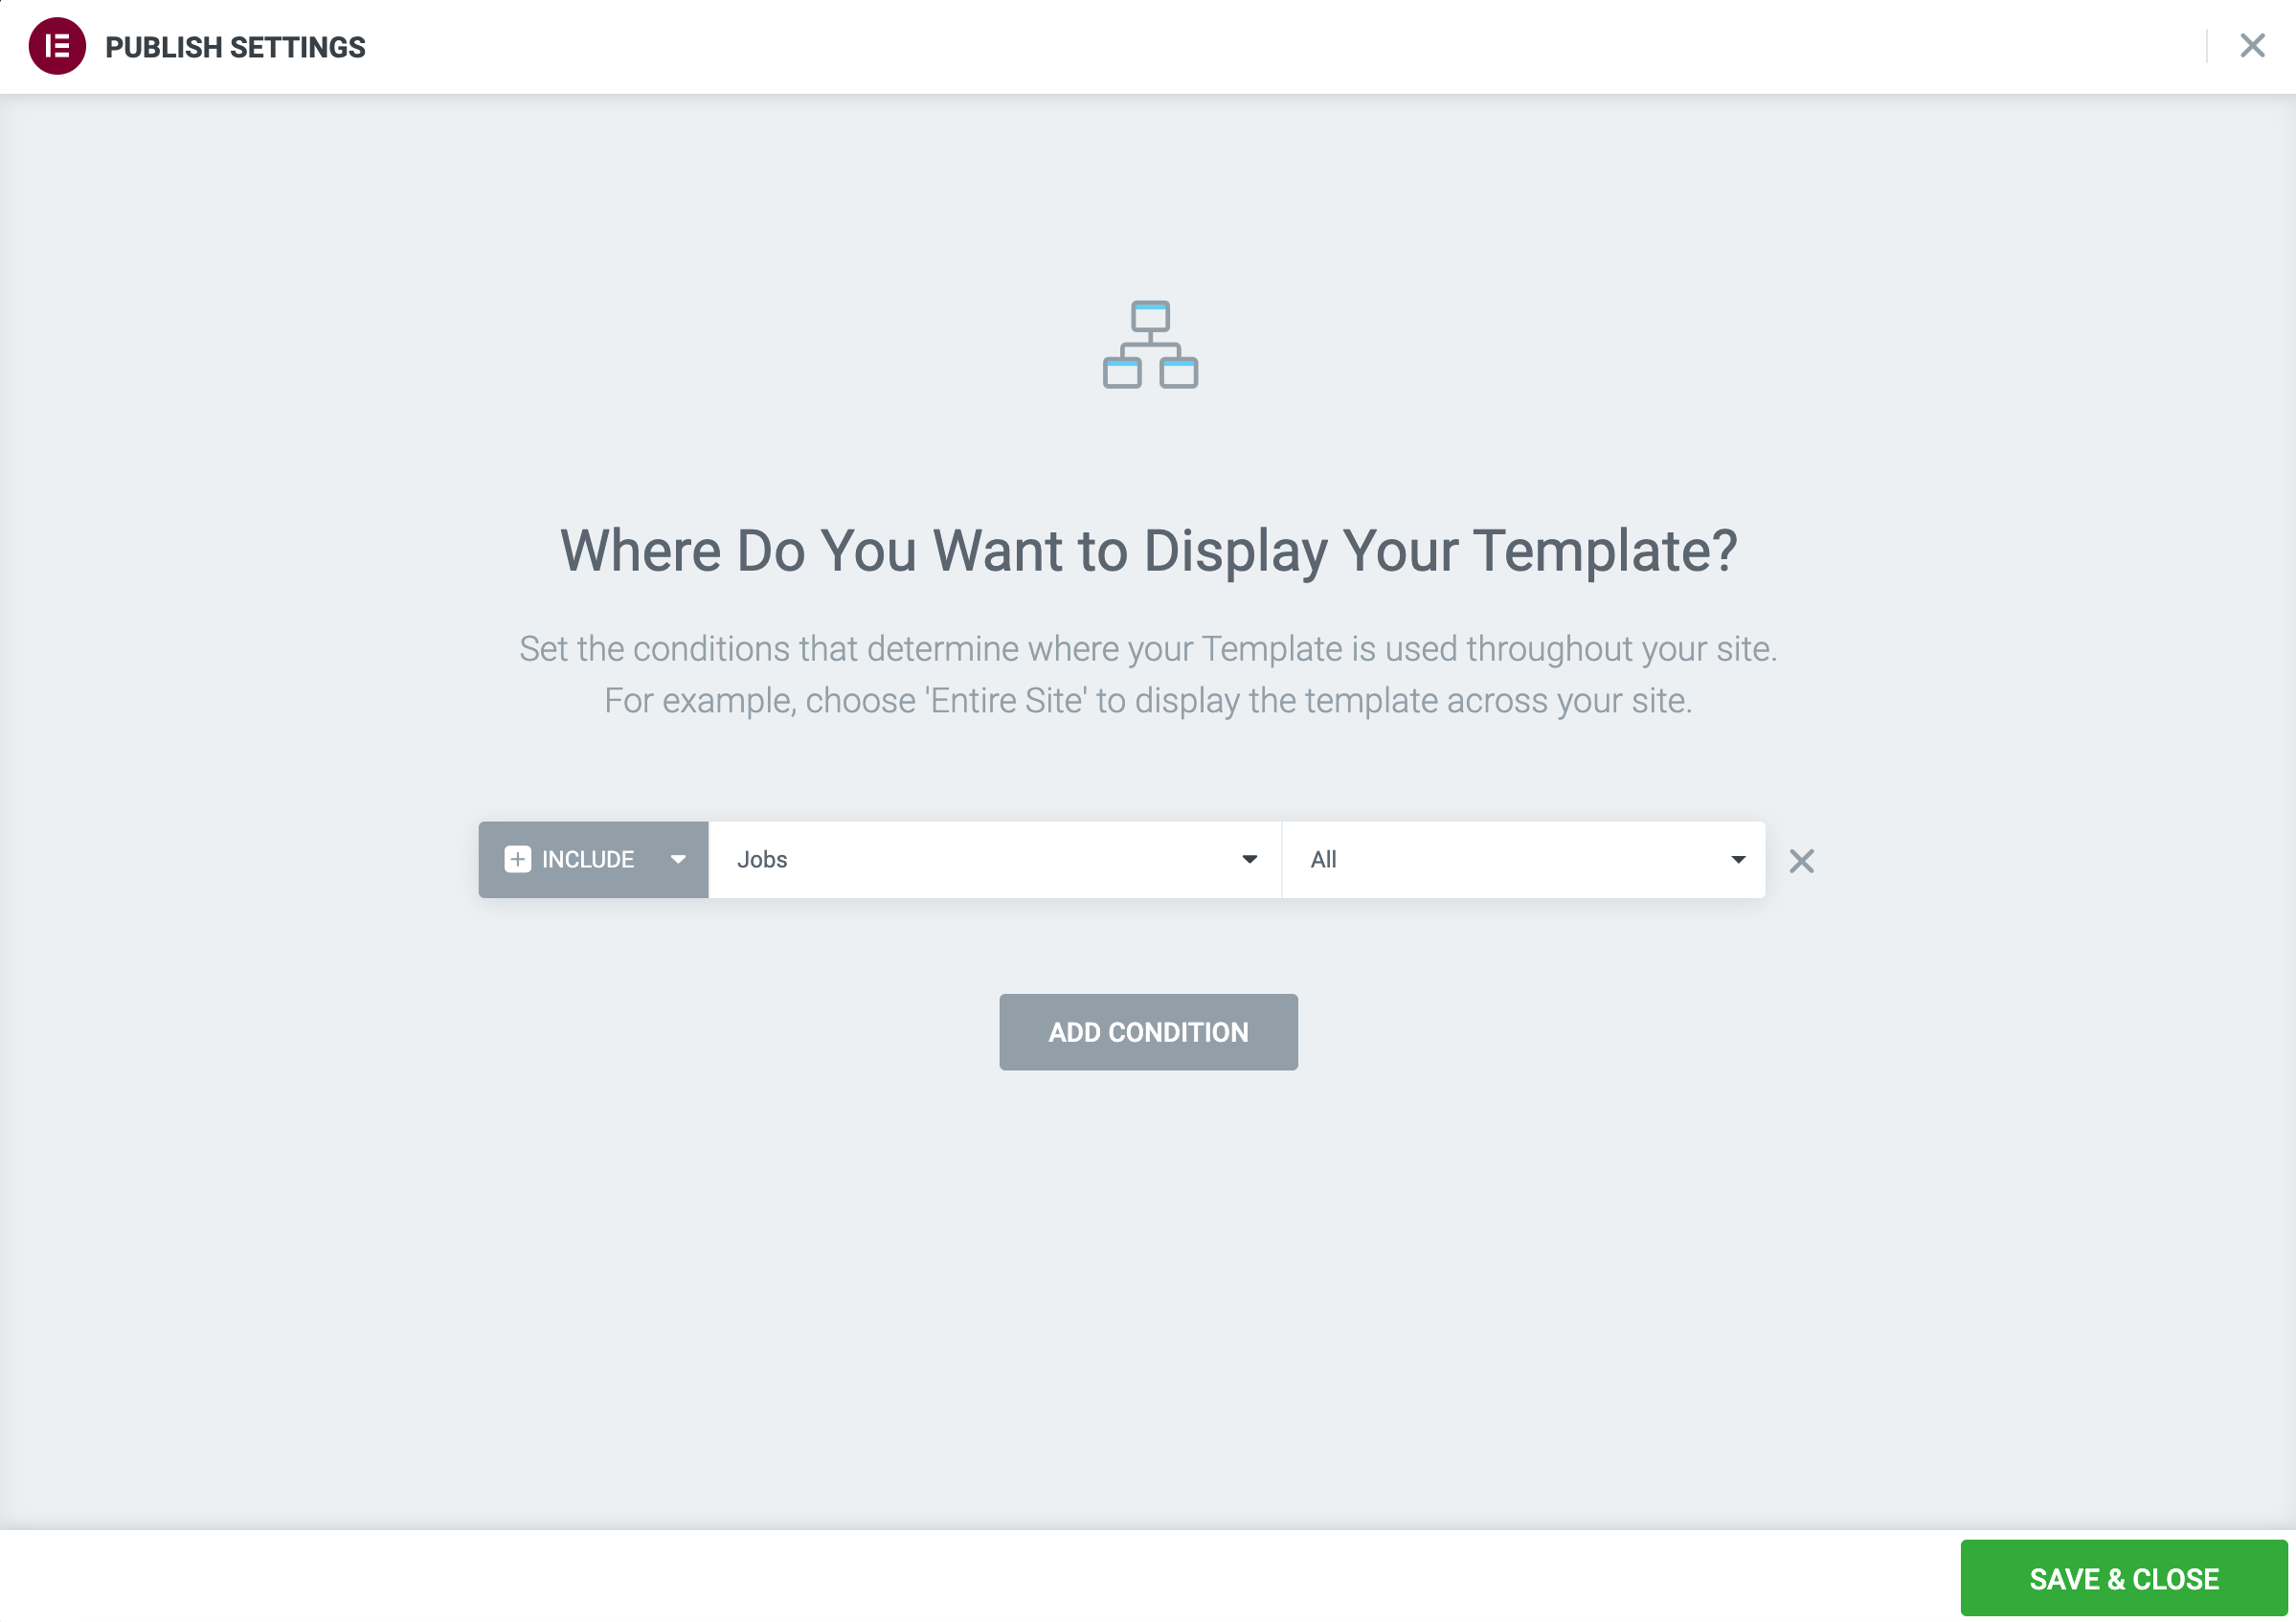
Once your new Jobs Template has been built and designed, it can now be saved as a template to your Template Library. Then you can define for which posts (in this case Jobs type posts) to utilise the new designed template.
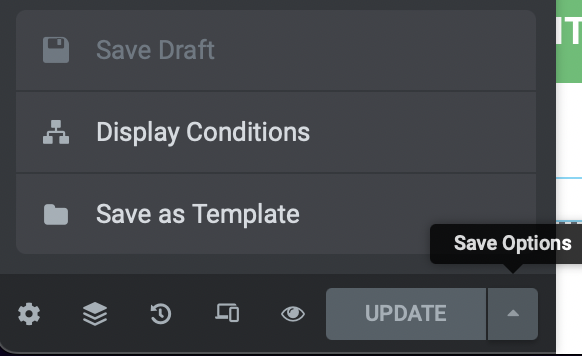
The Save Options arrow next to the “Update” button allows you to set the Display Conditions of any Template or to create a new template by saving the page’s design as a new template. Clicking the “Save as Template” option brings up a dialogue button where you can define the Template Name.

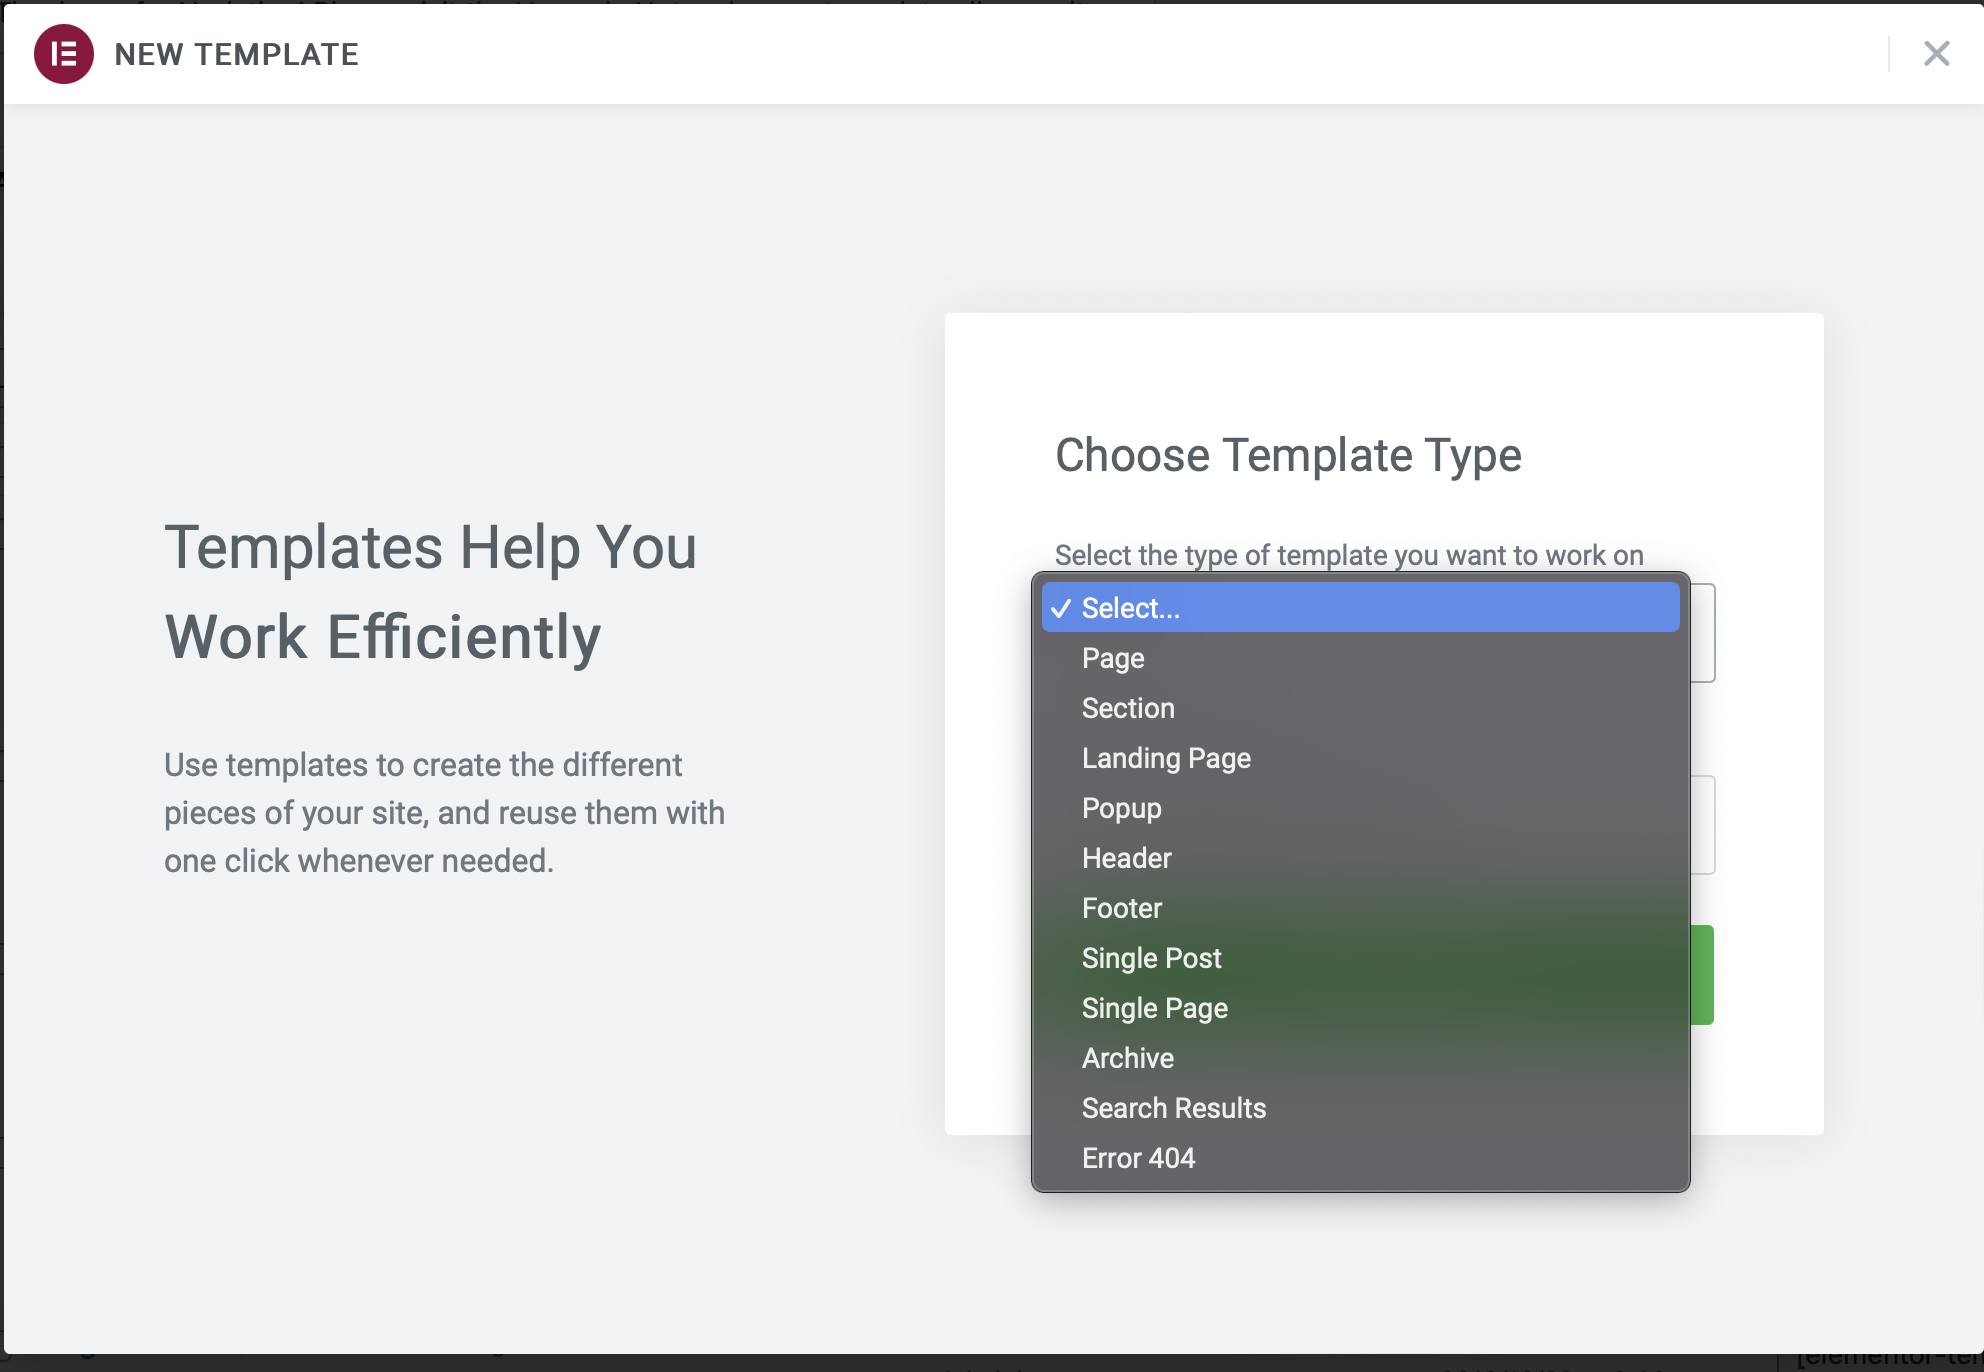
Alternately you can create a new template directly from Elementor Pro’s Template Builder in the Admin section to create a new template following the below steps:
Can I change the job search box and the job listing styles using the Elementor Connector for WP Job Manager plugin?
Yes – that’s the heart of this plugin. To toggle between the search box and the job listings while using the “Job Listings” widget, use the “Show Filters” display toggle. Any changes made will affect both the search box AND the listings on the front end.
Can I change the layout & design of the single job listing page?
Yes – this is perfectly possible although you’ll need to create a custom job page template under Templates > Theme Builder > Add New. This requires Elementor Pro to be installed & active.
Can I can the design of the “Job Preview” step after submitting a job
Yes – you’ll need to make use of the advanced Job Preview widget while also using the free Dynamic Visbility for Elementor plugin
Will Elementor Connector for WP Job Manager work with my theme?
Very likely – As long as your theme does not override the core templates of the Job Manager plugin with its own custom-designed ones. We endeavour to make our plugin as flexible/compatible as possible. At the moment, the only known theme that’s incompatible is BuddyBoss due its fixed template overrides.