Elementor Connector for Resumes
Elementor Connector for Resumes allows you to build unique resume boards on any Elementor-powered website using new widgets and design components empowered by WP Resume Manager. This allows you to place Resume Board components (widgets) anywhere on any page or post, and then style the design and layout of these widgets, along with the page/post until it meets your desired look and feel.
Requirements #
In order for Elementor Connector for Resumes to work, you will need the latest version of the following:
To make use of the advanced features of this plugin, you’ll also need the following:
- Elementor Pro (For editing the Single Resume Page)
- Dynamic Visibility for Elementor (For styling the “Resume Preview” and “Resume Edit” pages)
Installation #
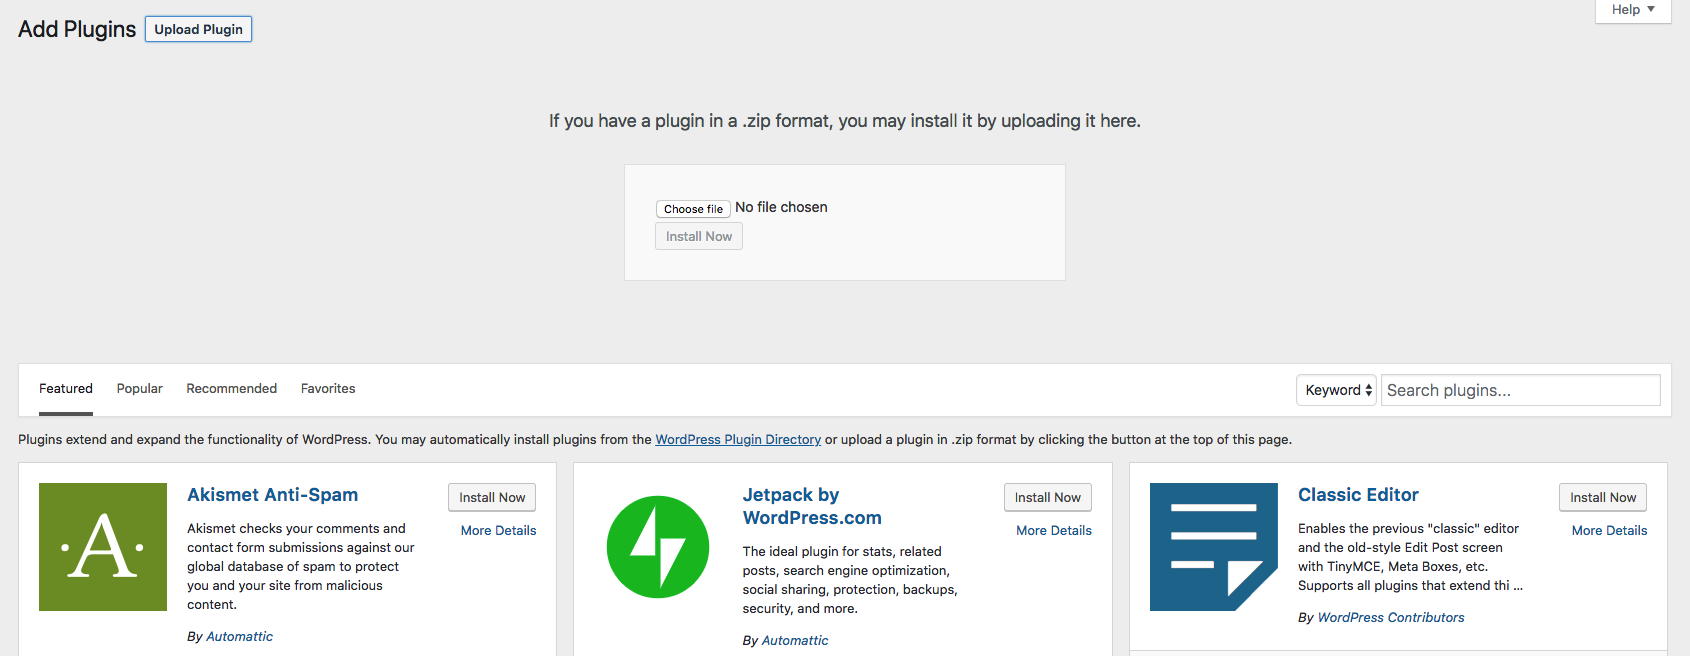
To install Elementor Connector for Resume Manager, please follow these steps:
- Download the .zip file from your account at Tiny Giant Studios after purchase.
- Go to: WordPress Admin > Plugins > Add New to upload the zip file you downloaded in step 1.
- Activate the extension.
If you need to install WordPress plugins manually via FTP, please follow the guide: “How to Install a WordPress Plugin – Step by Step for Beginners“.
Please note that both WP Job Manager and Resume Manager needs to be installed and activated before activating the Elementor Connector for Resume Manager
Resume Manager Widgets #
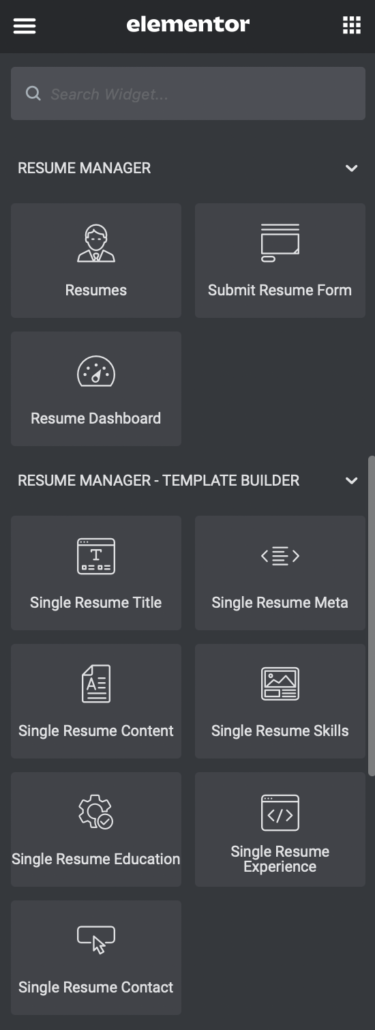
When Elementor Connector for Resumes is active, the following Elementor widgets are added to your Elementor page editor / themebuilder settings:
Resume Manager
Resume Manager – Template Builder (Requires Elementor Pro)
- Single Resume Title
- Single Resume Meta
- Single Resume Content/Description
- Single Resume Education
- Single Resume Experience
- Single Resume Skills
- Single Resume Contact
Resumes
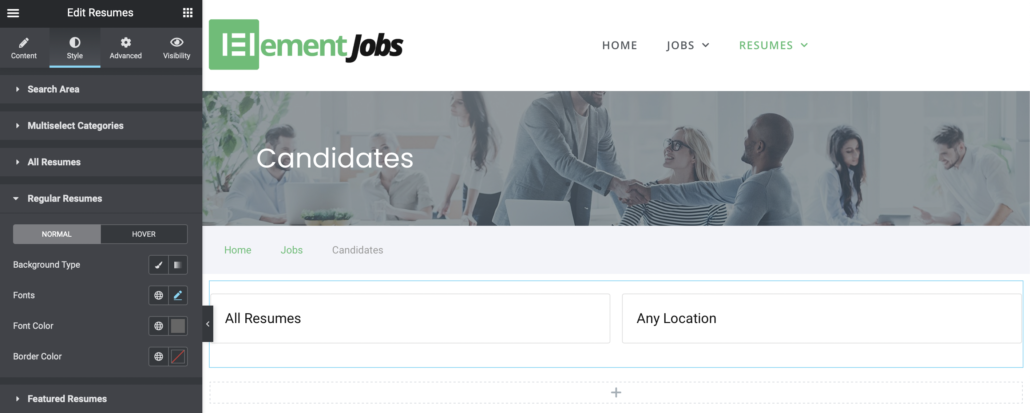
The Resumes widget is the heart of the Elementor Connector for Resumes and is used to display the resume search form and/or a list of candidates that meet specific criteria.
To add the Resumes widget to a page/post on your website using Elementor, follow these steps:
- Navigate to a page/post of your choosing
- Click on the Edit with Elementor button
- Using the Elementor widget navigation panel on the left, scroll down until you find a section called Resume Manager
- Drag and drop the Resumes widget to the place within your page where you want it to appear
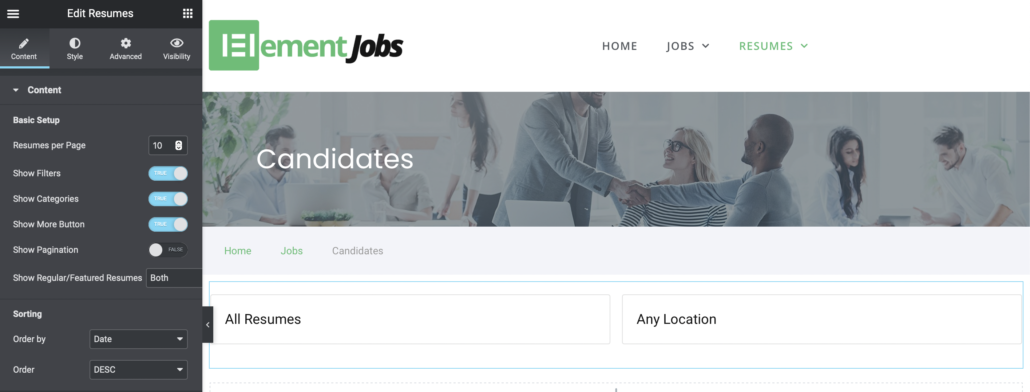
Once a widget has been added to the page, the widget settings panel will appear on the left with the following options:
Content Tab
- Resume Per Page – Define the number of resumes / candidates that will be listed
- Show Filters – A toggle to show/hide the search resume search form
- Show More Button – A toggle to show/hide the “More” pagination button
- Show Regular/Featured Resumes – A select field to show regular or featured resumes
- Order by – The order in which resumes should be displayed
- Order – Whether the order determined above should be in ascending or descending order
Style Tab
Settings that allows you to modify the design and style of the Resumes widget – easily grouped for your convenience:
- Search Area
- Multiselect Categories
- All Resumes
- Featured Resumes
The settings grouped in the sub-tabs include relevant settings options including means to configure the background colour or images, borders, padding margins, font styles, font colours, hover styles and much more! These settings can be configured by clicking on their respective settings areas to tweak the design/layout on the page itself. Your imagination is the limit!
Submit Resume Form
The Submit Resume Form widget adds the Resume Manage submission form to any area using the Elementor page builder. While this widget doesn’t have any content settings of its own, the style tab does allow for the following sections to be configured:
- Form
- Fieldsets (Sections containing the labels and input fields)
- Labels
- Input Fields
- Links
- Buttons
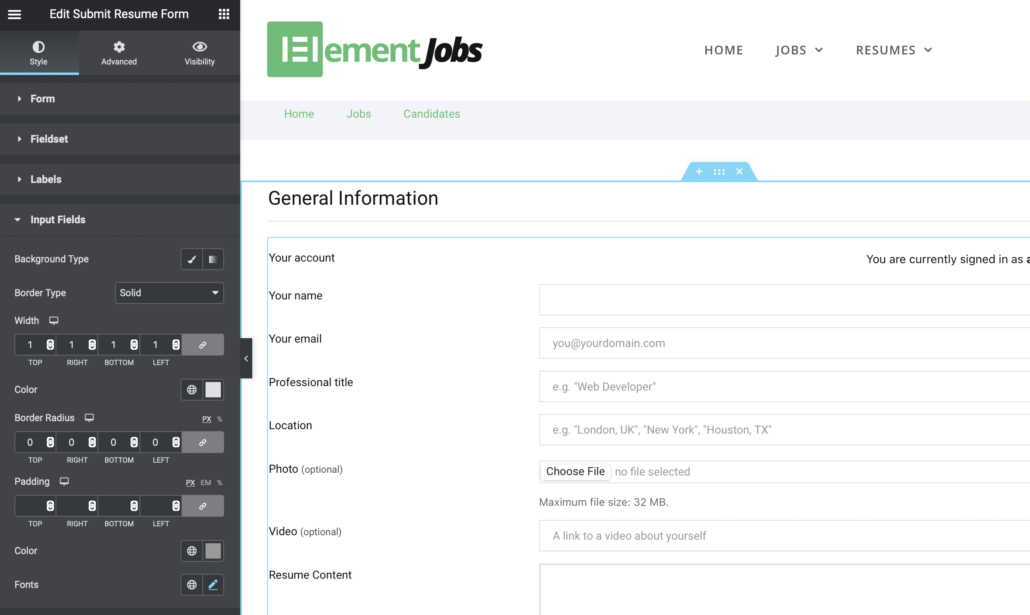
To add the Submit Resume Form widget to your page, follow these steps:
- Navigate to the desired Resume Submission Page of your choosing
- Click on the Edit with Elementor button
- Using the Elementor widget navigation panel on the left, scroll down until you find a section called Resume Manager
- Drag and drop the Submit Resume Form widget to the place within your page where you want it to appear
Resume Dashboard
The Resume Dashboard widget is used to display a list of all resumes on the front end that was added or managed by logged-in candidate.
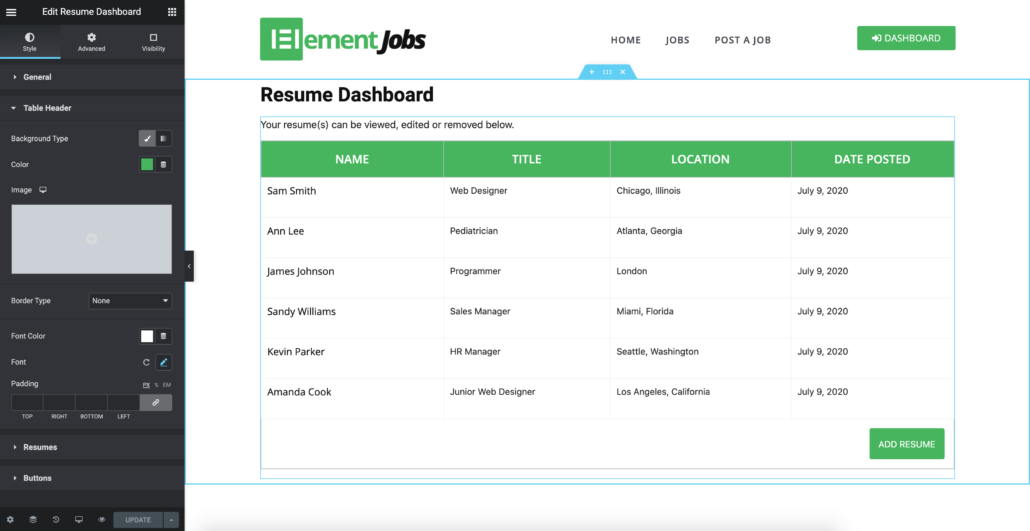
The Resume Dashboard widget provides the following options:
Style Tab
- General
- Table Header
- Resumes
- Buttons
The settings of each grouped sub-tabs include options to modify and style the background image or background colour, font styles, font colour, borders, margins, paddings, button styles, layout styles and more! These settings can be configured by clicking on their respective area and modifying the value while viewing the change in real time on the page itself.
Template Builder Widgets #
Elementor Pro allows users to build custom dynamic pages and templates. Users can build or customise their own dynamic Resume Template using the advanced widgets in Elementor Connector for Resumes. The section below describes the various widgets that can be utilised in constructing and saving a custom Resume Template to be used when displaying each of the candidates’ resume.
Please note: ensure Elementor Pro is installed, active and connected with an active license to access the Template Builder functionality.
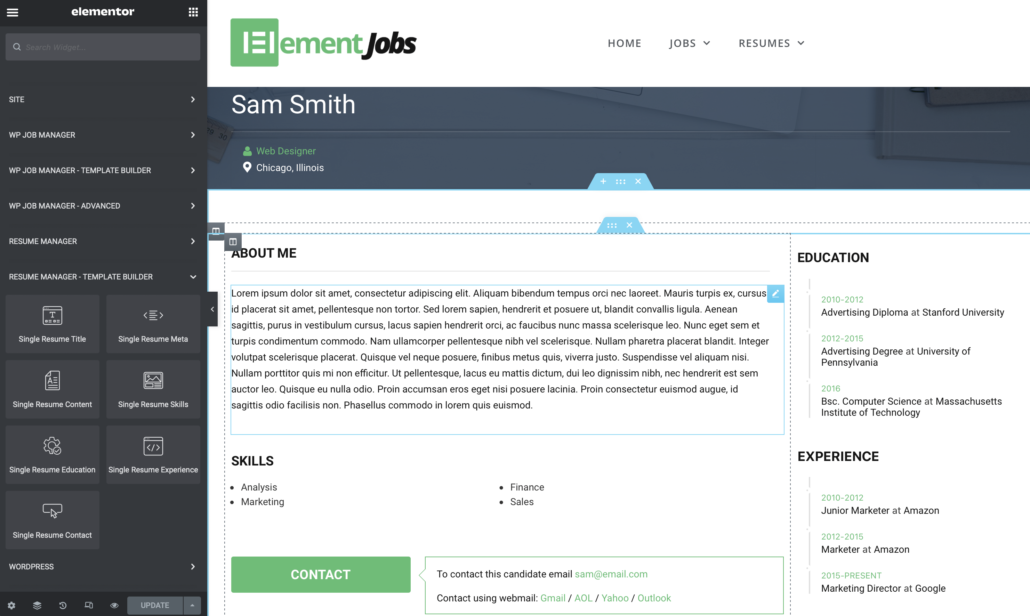
Single Resume Title
The Single Resume Title widget allows you to place and style the dynamic resume title in instances where a custom layout for the single resume page is required.
Once a widget has been added to the template, the widget settings panel will appear on the left with the following options:
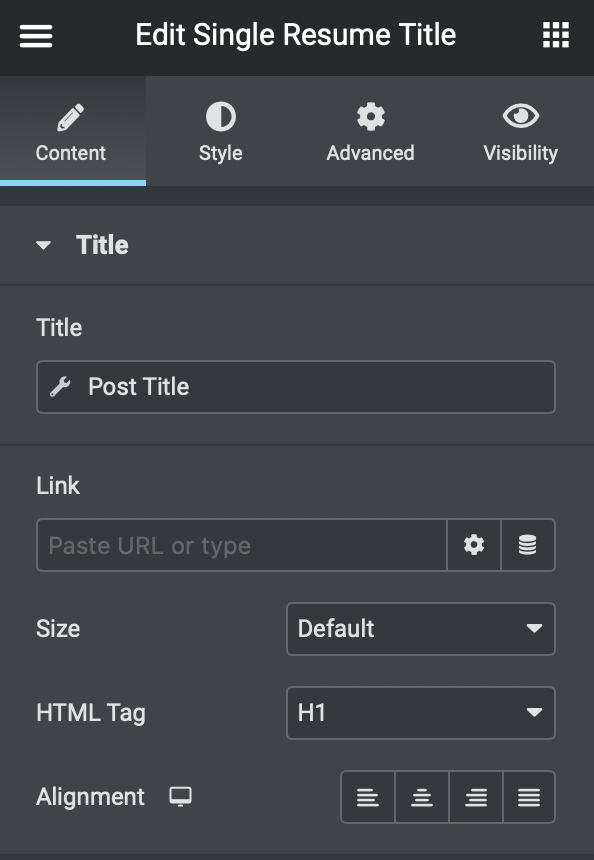
Content Tab
- Title – Includes the ability to add pre- and post title HTML markup selectors for custom CSS
- Link – In case the resume title is used to link elsewhere
- Size – Used for adjusting the size of the title
- Tag – Used to determine the HTML priority of the heading, ranging from H1 to H6
- Alignment – Used to adjust the layout of the resume title
Style Tab
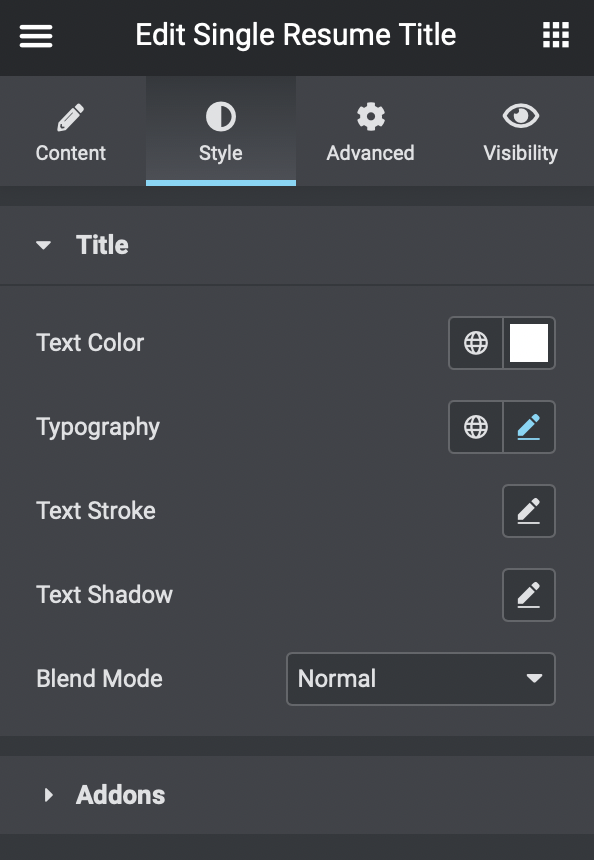
- Text colour
- Typography – including options to configure:
- Font family
- Font size
- Font-weight and styles
- Line height
- Letter and word spacing
- Text Shadow
- Blend Mode – to style artistically with background images or colour sections
Single Resume Meta
The Single Resume Meta widget adds the meta information (Photo, Title, Location and Links) in your unique template design and allows you to style the elements accordingly.
Once the Single Resume Meta widget has been added to the template, the widget style settings panel will appear on the left with the following options:
Style Tab
- General
- Candidate Photo
- Candidate Title
- Candidate Location
- Resume Links
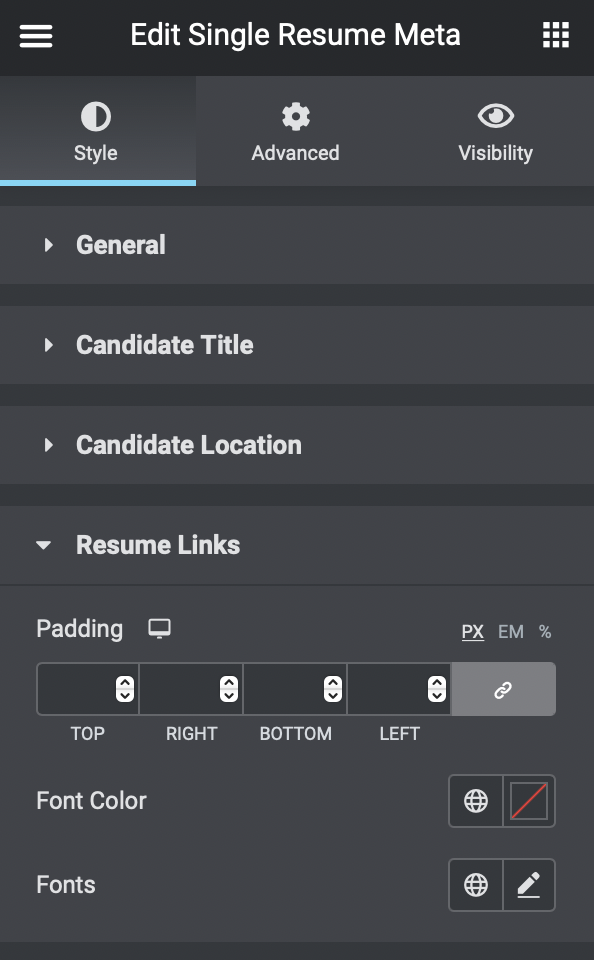
Each grouped section includes various design style settings to configure the area background, colour, typography (including font-styles, font-family, font-weight, line-height, letter and word spacing), padding, margin, border and alignment. These settings can be configured by clicking on their respective settings areas and modifying the values to tweak the design/layout on the meta section itself.
Single Resume Content
Similar to the Single Resume Title and Single Resume Meta widgets, the Single Resume Content widget aims to add the resume description with uniquely styled layout & design.
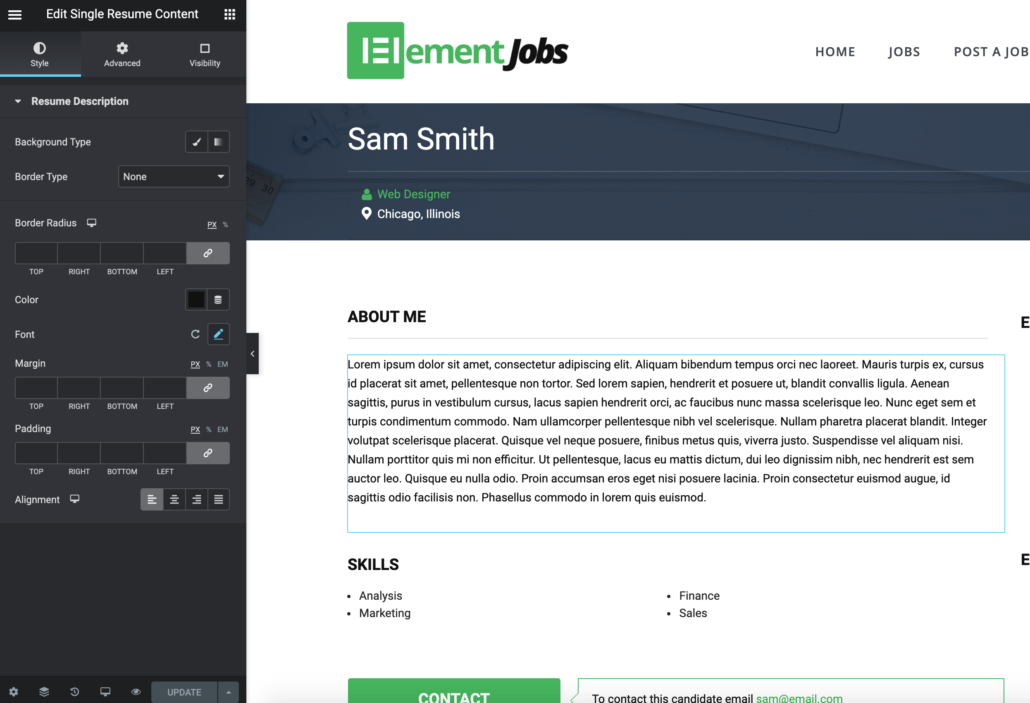
Once the Single Resume Description widget has been added to the template, the widget style settings panel will appear on the left with the following options:
Style Tab
- Resume Description
The Resume Description sub-tab include options for the background, border, border-radius, color, font, margin, padding and alignment.
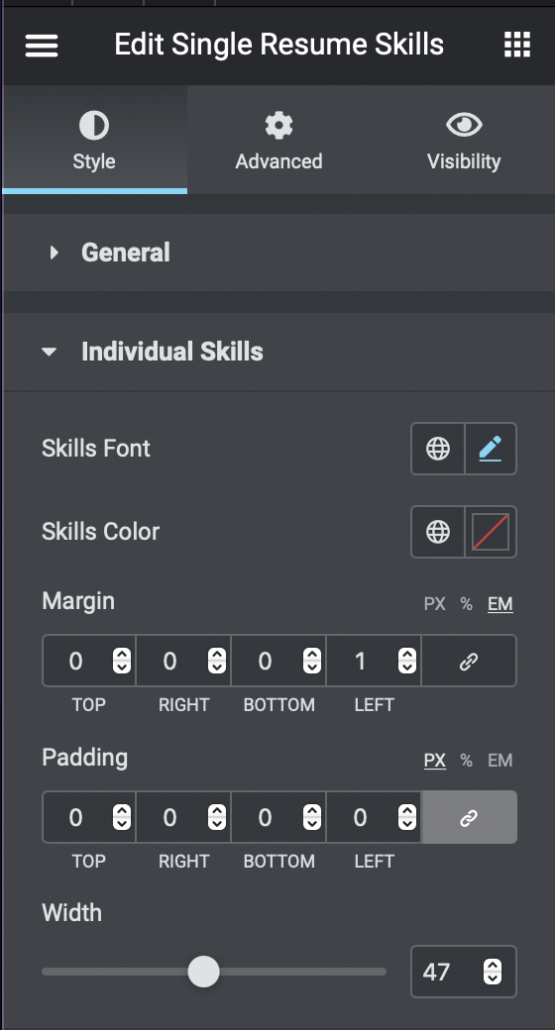
Single Resume Skills
The Single Resume Skills widget adds the application skills to the single resume page and allows for a custom layout & design.
Once the Single Resume Skills widget has been added to the template, the widget style settings panel will appear on the left with the following options:
Style Tab
- General Settings
- Individual Skills Settings
Single Resume Education
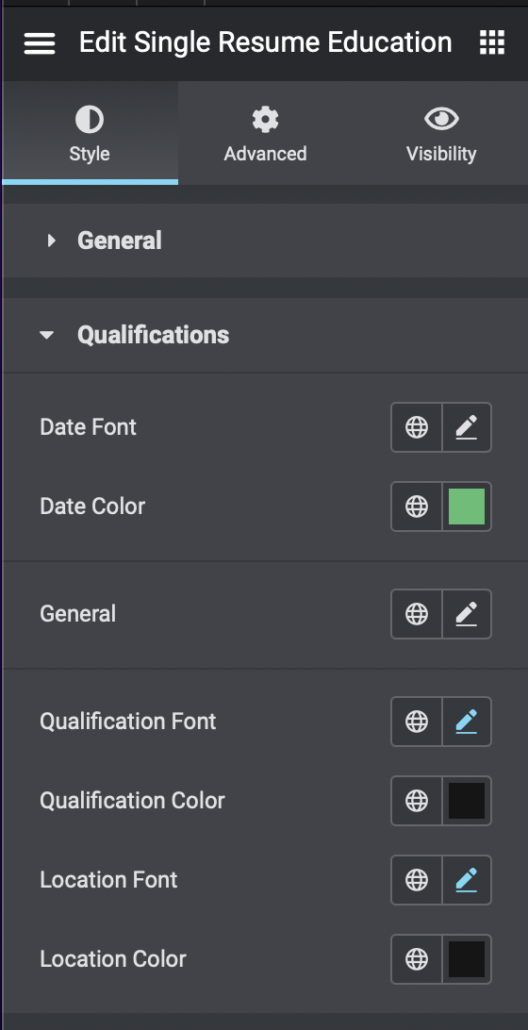
The Single Resume Education widget adds the application skills to the single resume page and allows for a custom layout & design.
Once the Single Resume Education widget has been added to the template, the widget style settings panel will appear on the left with the following options:
Style Tab
- General Settings
- Qualifications Settings
Single Resume Experience
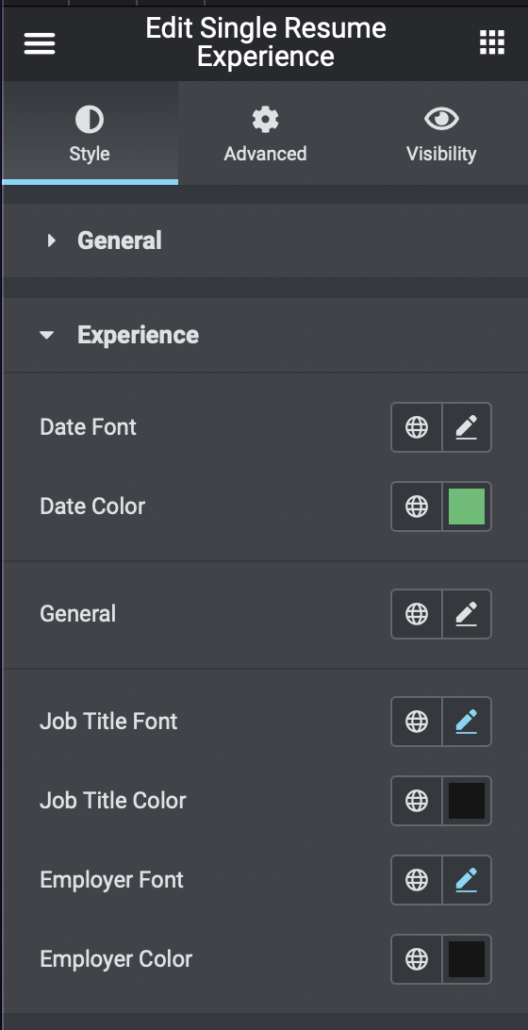
The Single Resume Experience widget adds the application skills to the single resume page and allows for a custom layout & design.
Once the Single Resume Experience widget has been added to the template, the widget style settings panel will appear on the left with the following options:
Style Tab
- General Settings
- Individual’s Experience
Single Resume Contact
The Single Resume Contact Contact widget adds the application but to the single resume page and allows for a custom layout & design.
Once the Single Resume Contact widget has been added to the template, the widget style settings panel will appear on the left with the following options:
Style Tab
- Contact Button
- Contact Information
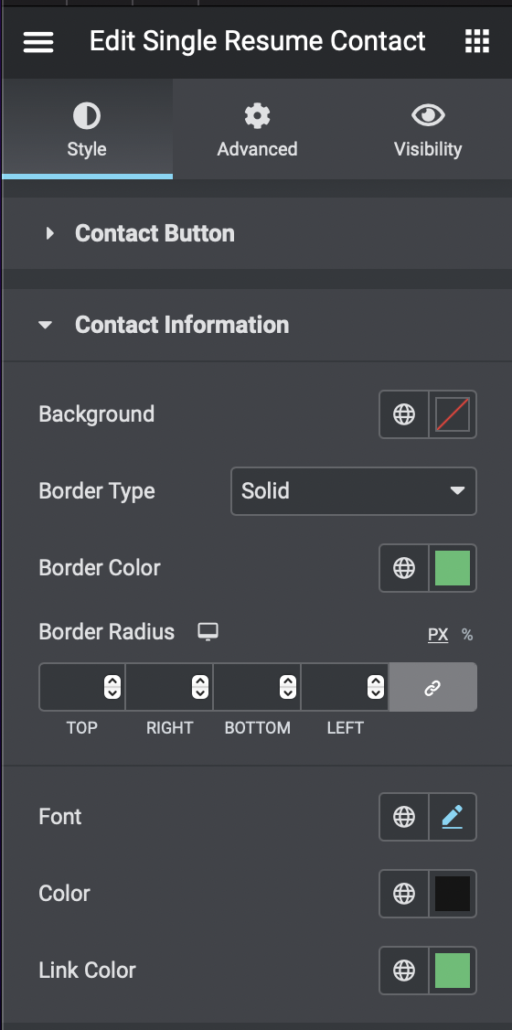
These sub-tabs include options for the background, border, border-radius, color, font, margin, padding, link color and alignment.
Saving the Resume Template #
Once your new Resume Template has been built and designed, it can now be saved as a template to your Template Library. Then you can define for which posts (in this case Resume type posts) to utilise the new designed template.
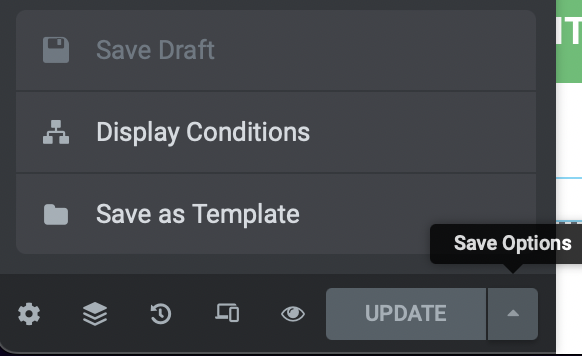
The Save Options arrow next to the “Update” button allows you to set the Display Conditions of any Template or to create a new template by saving the page’s design as a new template. Clicking the “Save as Template” option brings up a dialogue button where you can define the Template Name.
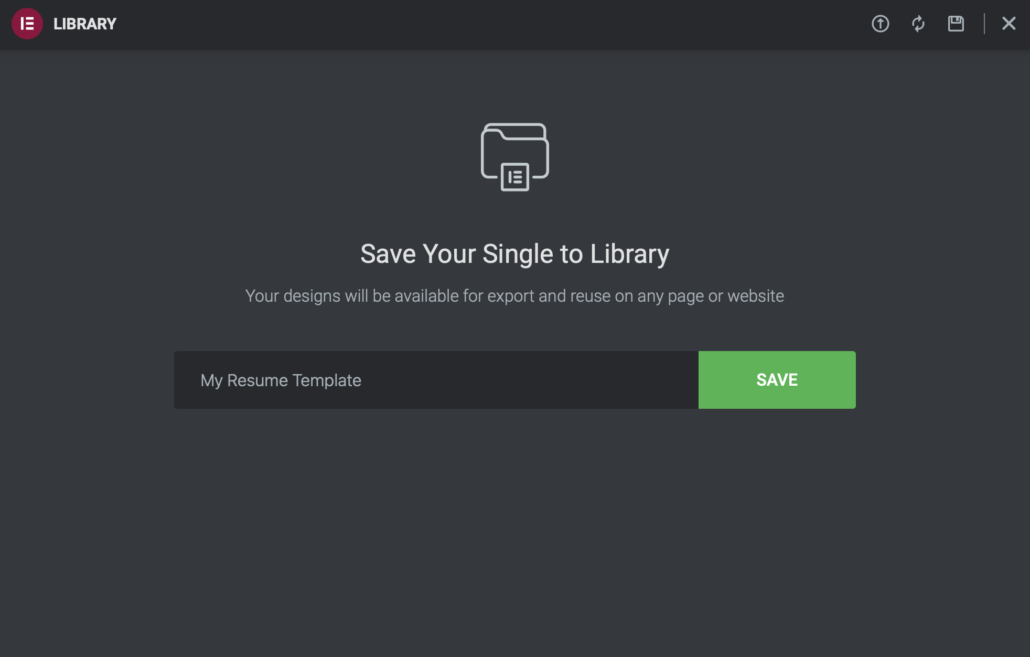
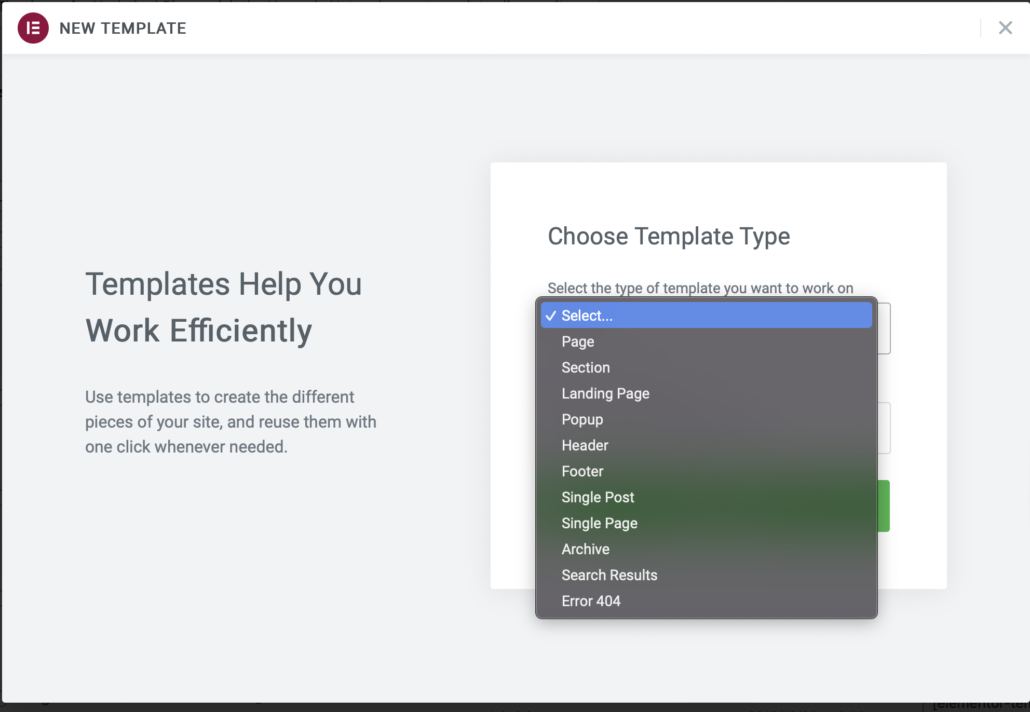
Alternately you can create a new template directly from Elementor Pro’s Template Builder in the Admin section to create a new template following the below steps:
- From WordPress’s Admin, navigate to Elementor’s Templates tab
- Click on Add New
- In the pop-field field, select Single template type
- If Single is not available, Single Post can be utilised
- Choose any name for the template override in the field provided (e.g. Single Resume Template)
- Build / style / design using Elementor Connector widgets on the page.
- When ready to publish, save the page
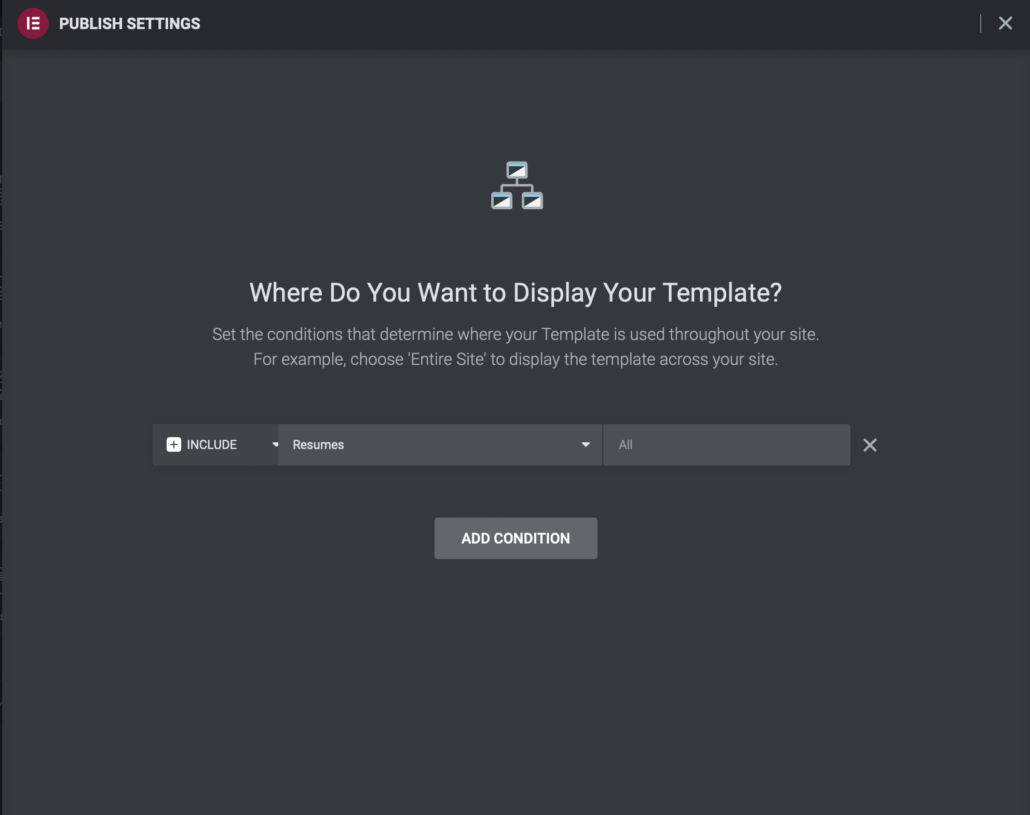
- Configure the Display Options so that “Resumes” and “All” are selected so that the Single Template can be used on resume pages on the site
Frequently Asked Questions #
Can I change the resume search box and the resume styles using the Elementor Connector for Resumes plugin?
Yes – that’s the heart of this plugin. To toggle between the search box and the resumes while using the “Resumes” widget, use the “Show Filters” display toggle. Any changes made will affect both the search box AND the resumes on the front end.
Can I change the layout & design of the single resume page?
Yes – this is perfectly possible although you’ll need to create a custom resume page template under Templates > Theme Builder > Add New. This requires Elementor Pro to be installed & active.
Can I design the “Resume Preview” step after submitting a resume
Not yet – This is on the roadmap to be included in a future version.

