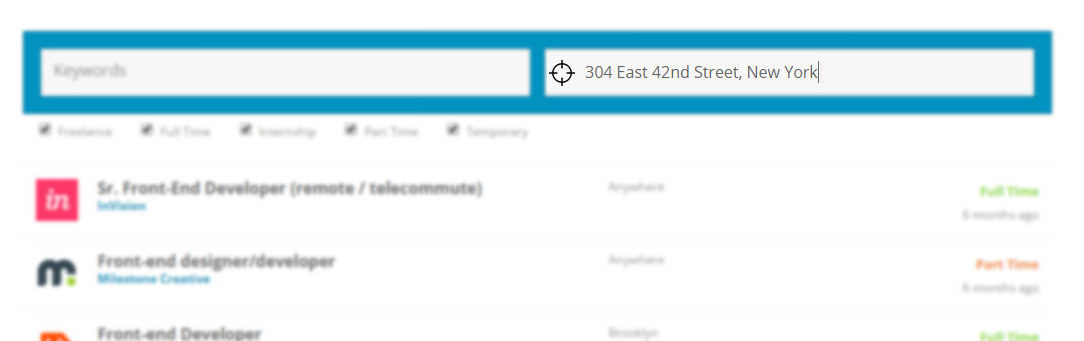
User Locator determines the location of the user and then filters on available jobs stored in WP Job Manager accordingly. User Locator uses Google’s Geolocation API which requires express permission from the end-user before any location data is shared with the website. Once allowed by the user, User Locator will determine the user’s present location and feed this to the Location input field of WP Job Manager – allowing the user to rapidly search for job listings in his/her immediate area. The user location data is stored as a cookie on the user’s browser to prevent unnecessary fetching of server data in each page load.
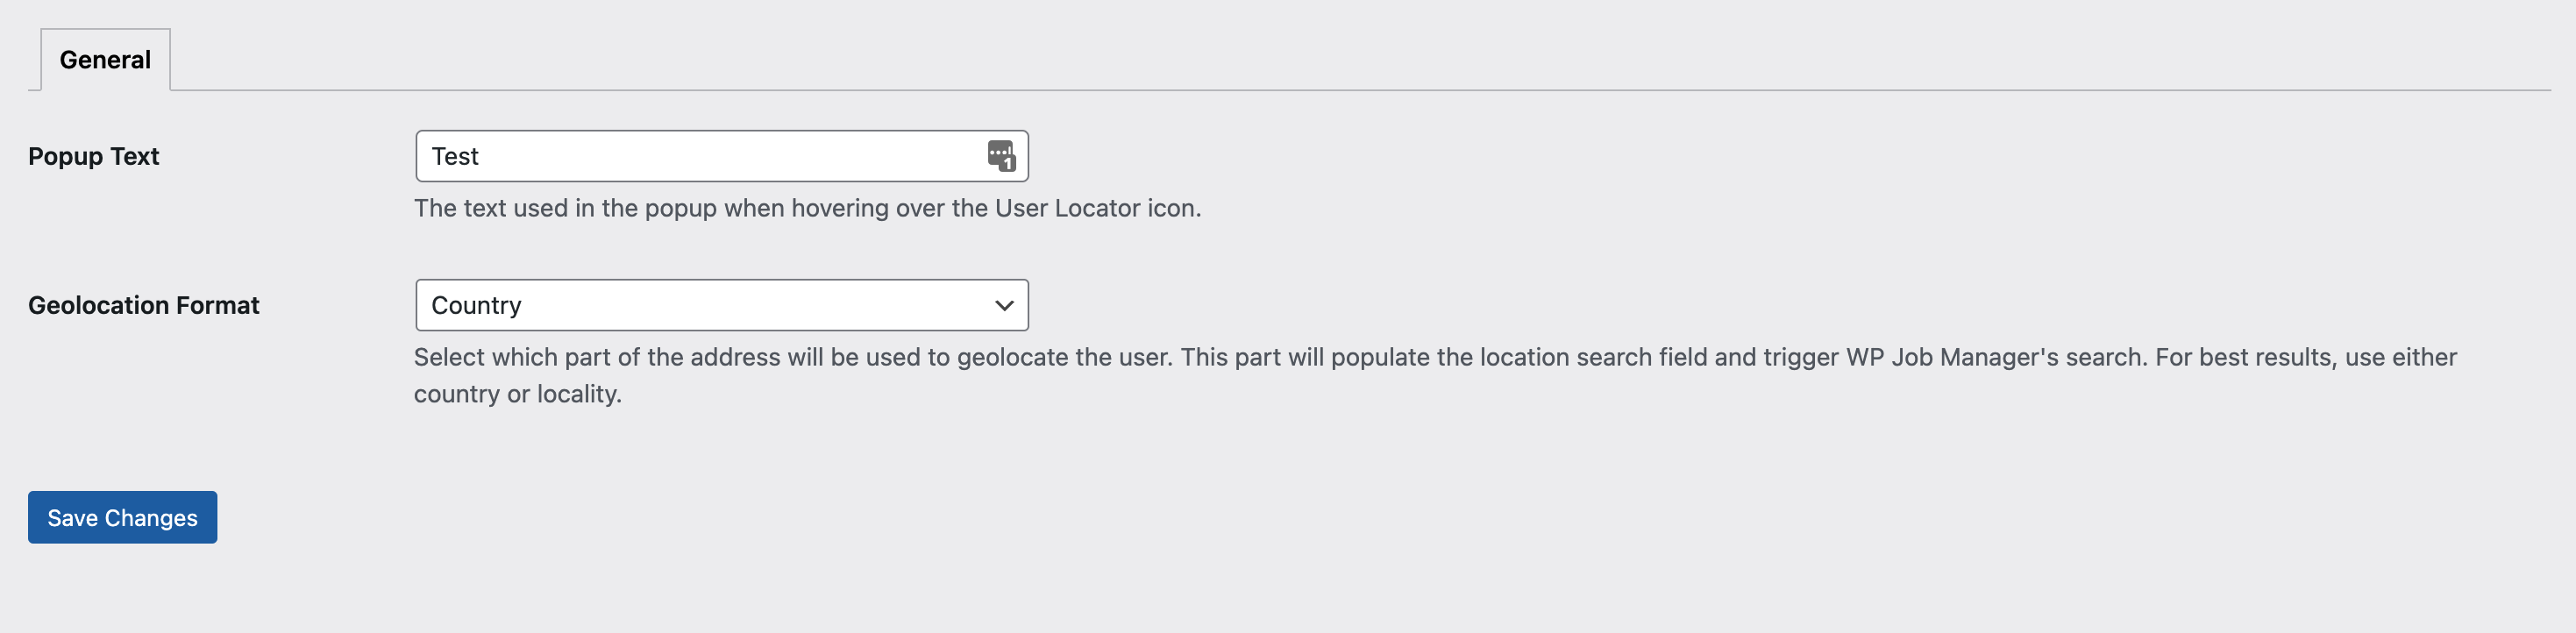
Once the extension has been activated, the Auto Location settings page will be made available in the Job Listings > User Locator section.
Popup Text: The text used for the popup overlay when a user hovers over the User Locator icon inserted on the “Location” input field on the front-end
Geolocation Format: Select which part of the address will be used to geolocate the user – the address part used can define the granularity of the search radius (large area such as country, or smaller area such as a specific street address). This address part will populate the location search field and trigger WP Job Manager’s filtered listings. For best results, we recommend using either country or locality. Options include:
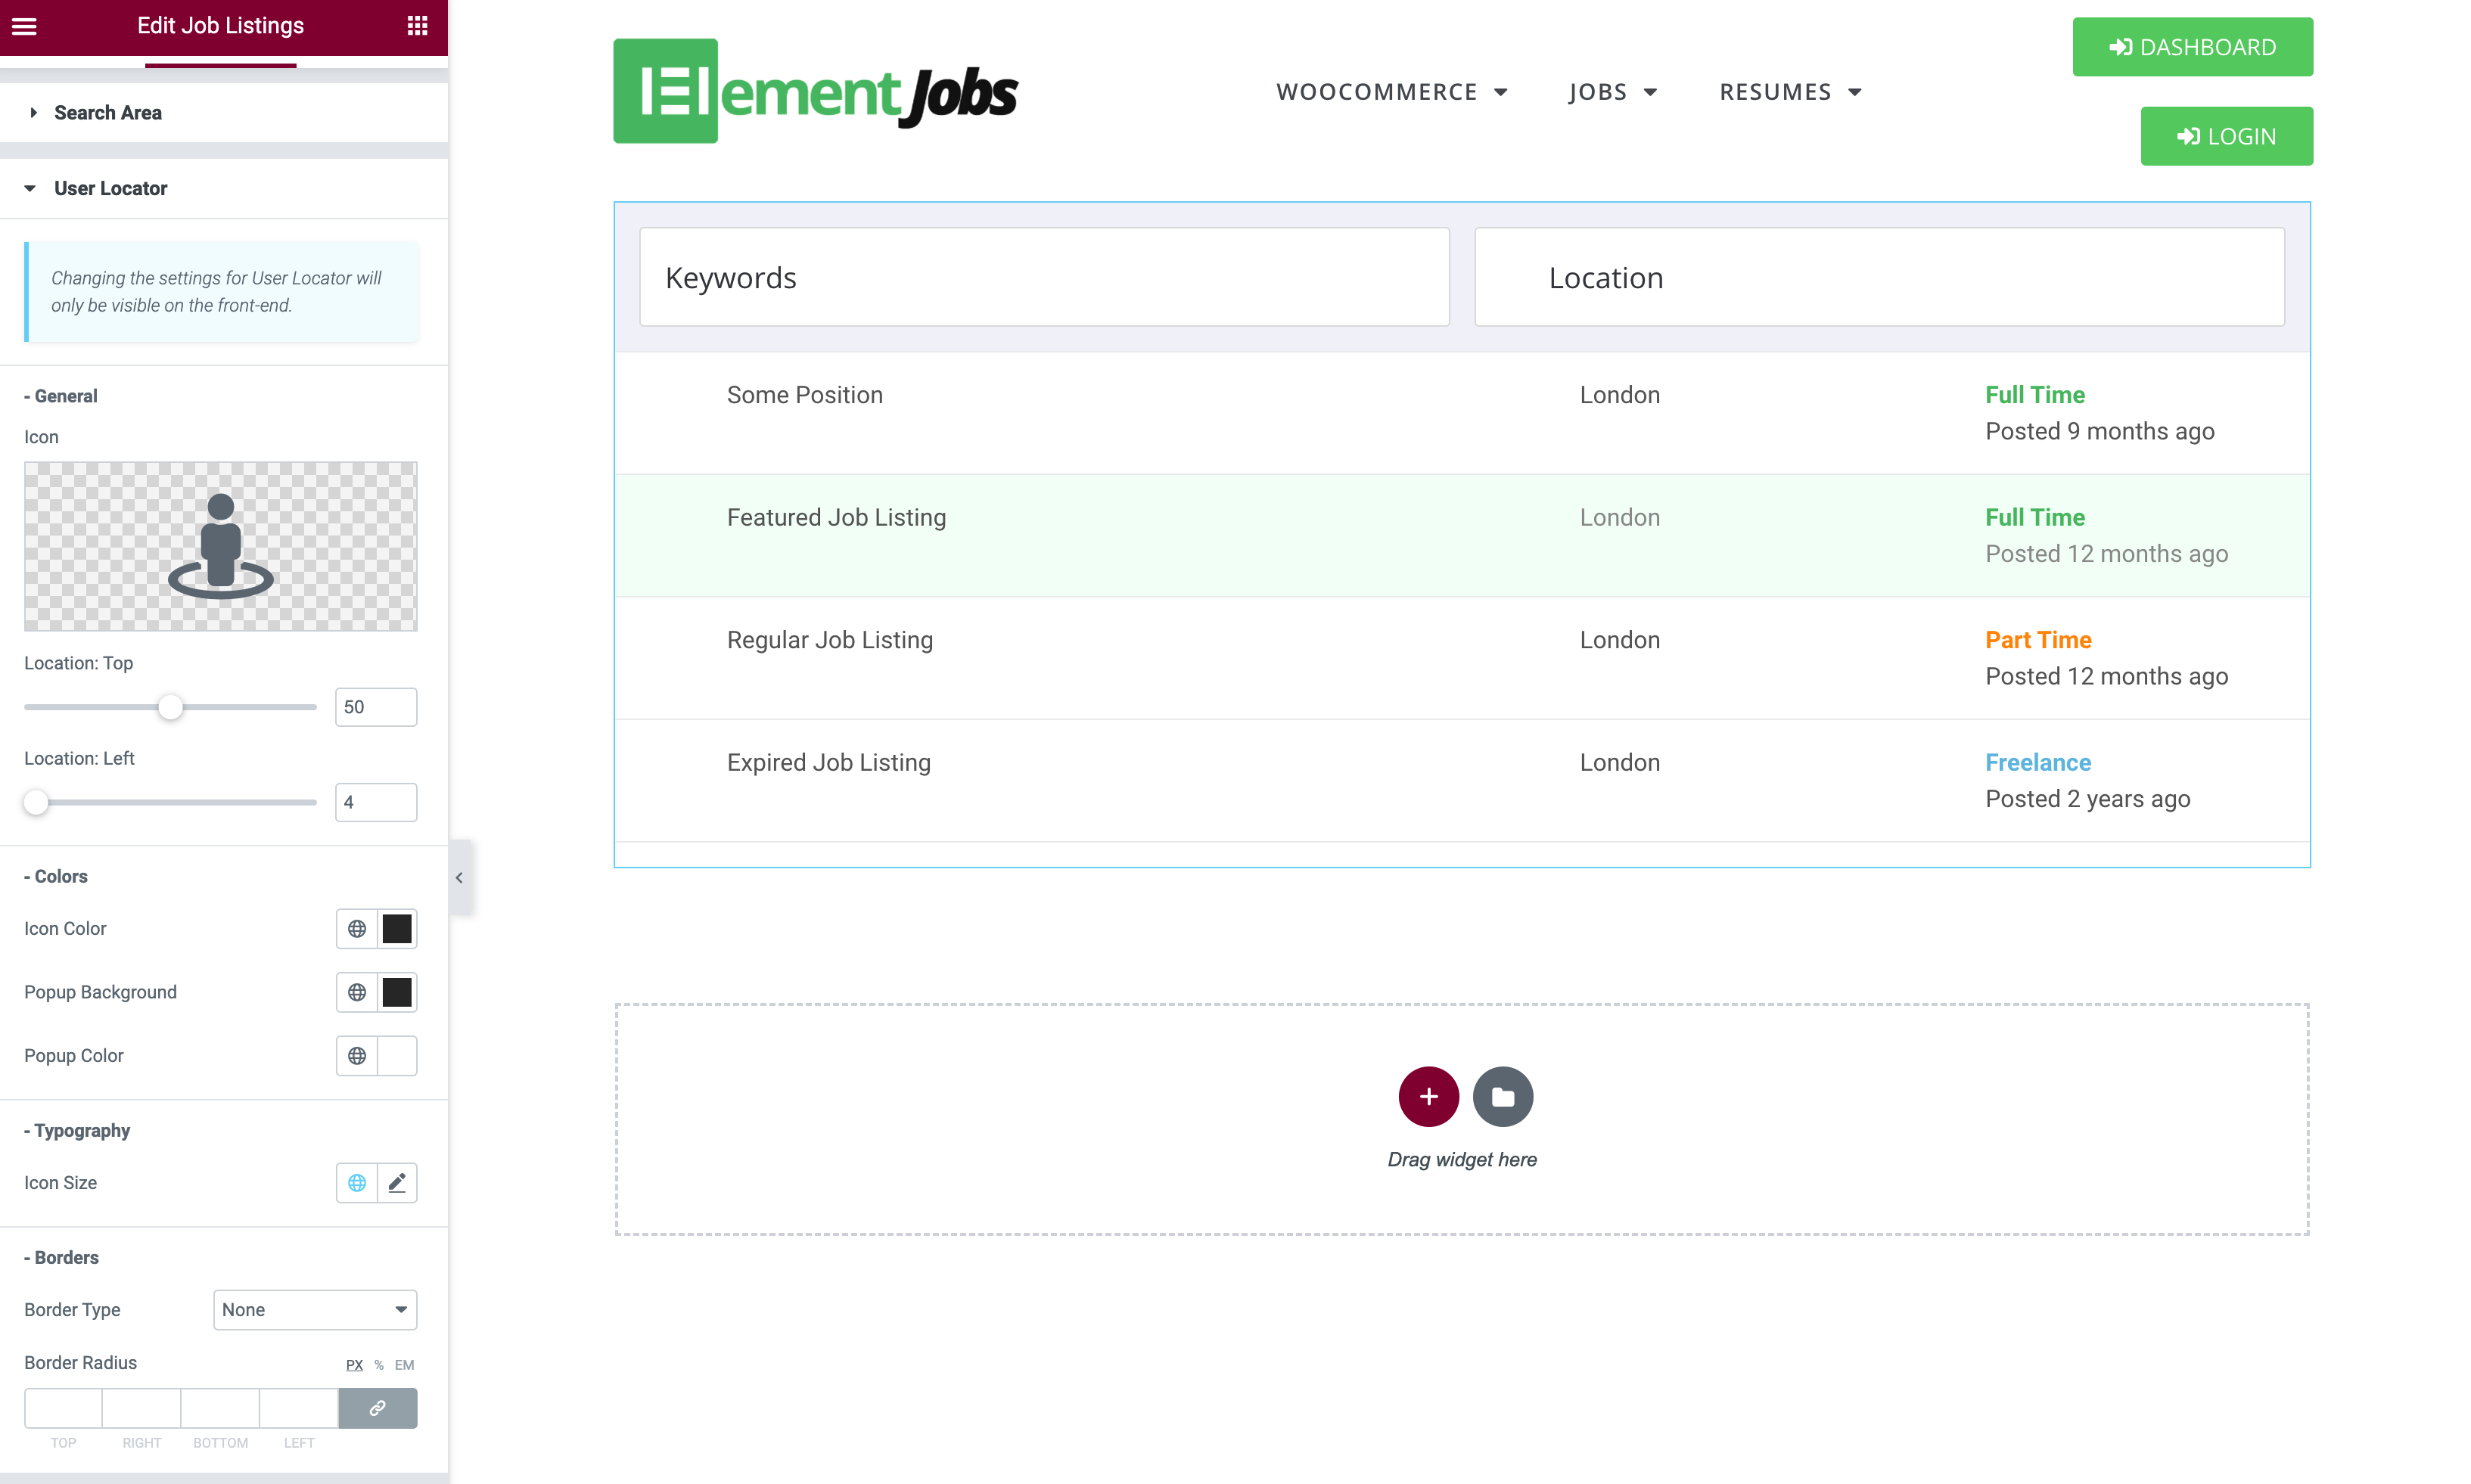
Icon: The icon to be shown in the location input field on the front-end. Style the current icon, or input your own icon
Location Top / Left: Detailed positioning of the icon
Colors:
Icon Color
Popup Background
Popup Font Color
Typography
Icon Size
Font Size
Word Spacing
Borders
Border Type
Border Radius
Please note: Changing the settings of the icon in Elementor page builder will not appear during edit mode. Changes will only be visible on the front end (in view mode).
Best practice is to restrict the API Key usage to your website domain. However, care should be taken to ensure the restriction is dynamic enough to cover all the pages where the User Locator plugin will be used (example: https://www.yoursite.com/* will ensure User Locator can work on any page, including the Jobs listing page and the Job Submission page).